


10 Survival Projects to Make with Your Swiss Army Knife
By Bryan Lynch in the Victorinox Swiss Army Knife Camping & Outdoor Survival Guide
Around the age of five or six, I received my first pocketknife from my dad. It was a used Swiss Army Knife, but I didn’t care that it wasn’t new. I didn’t use it for several days; I wanted to keep it as it was, perfect. Because my dad had given me one of his tools and trusted me with it, I was proud. Having my own tool, it felt like my first rite of passage. In my young mind, I thought I was finally a man! The knife became an extension of my body, and I never went anywhere without it. I used it to sharpen sticks, carved letters into pieces of bark, dissected plants, and more. I even tried my hand (unsuccessfully) at whittling. One of my favorite activities was learning how to start fires with the magnifying glass. To my mom’s dismay, many scorch marks found their way onto my shoes and pant legs. After all, I had to test the limits of the greatest tool I had ever owned!
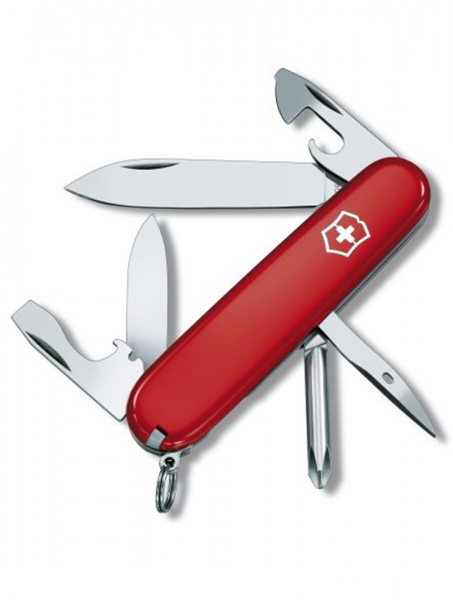
That first knife instilled in me a lifelong passion (though some might call it an obsession) to always have a good knife on hand. Now, as a dad myself, I have had the pleasure of watching my kids use a Swiss Army Knife as I did when I was a boy. Whether you’re looking for bushcraft needs or survival skills, the following creations from my Victorinox Swiss Army Knife Camping & Outdoor Survival Guide will show how to use the iconic red multi-tool to create useful life-saving projects.
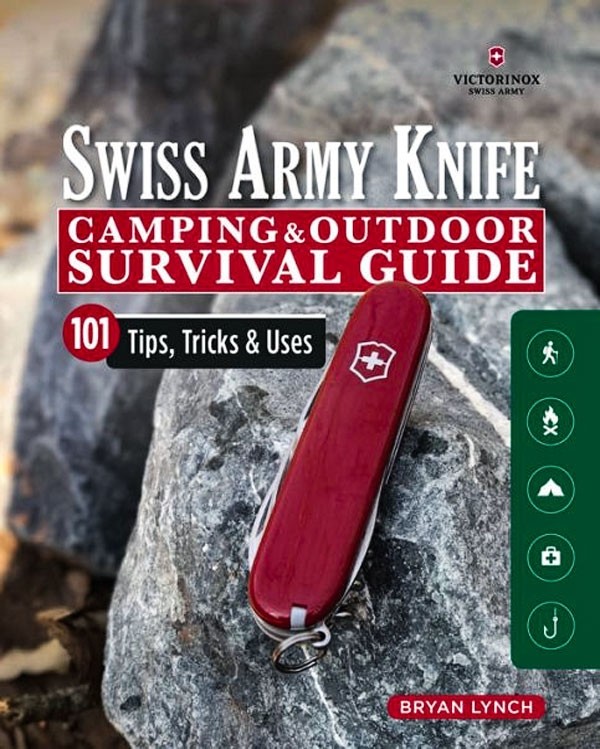
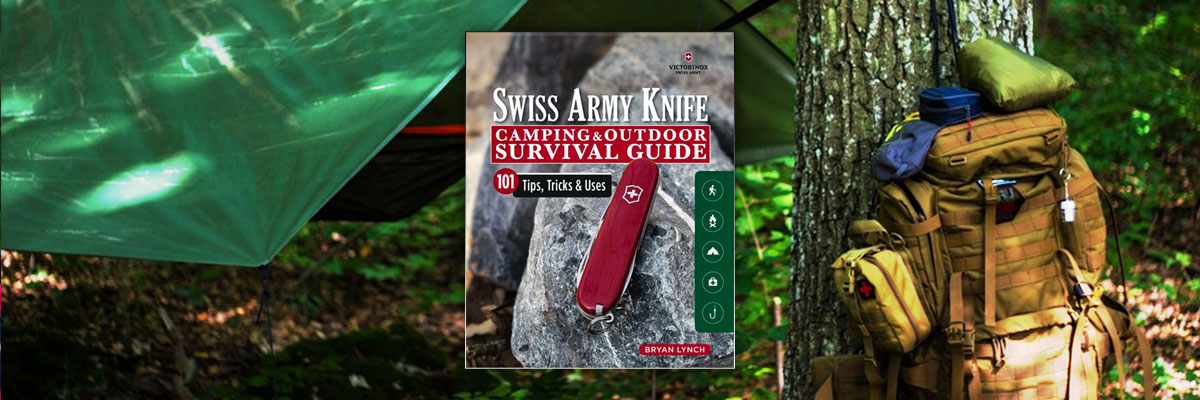
Victorinox Swiss Army Knife Camping & Outdoor Survival Guide
The whittling knife that will save your life! The first-ever Victorinox Swiss Army Knife Camping and Outdoor Survival Guide is a must-have for any outdoor enthusiast, boy scout, or bushcrafter. Divided into four sections, this guide will walk you through choosing and taking care of your Swiss Army Knife, projects for using your knife in the wild, and urban uses for everyday tasks. Carry this compact guide with you on your adventures while you follow along with Author Bryan Lynch through 101 survival tips, techniques, or uses such as a DIY water filter, making tools such as a hammer or drill, skin guards, or a signal mirror!
10 Survival Hacks
DIY Water Filter
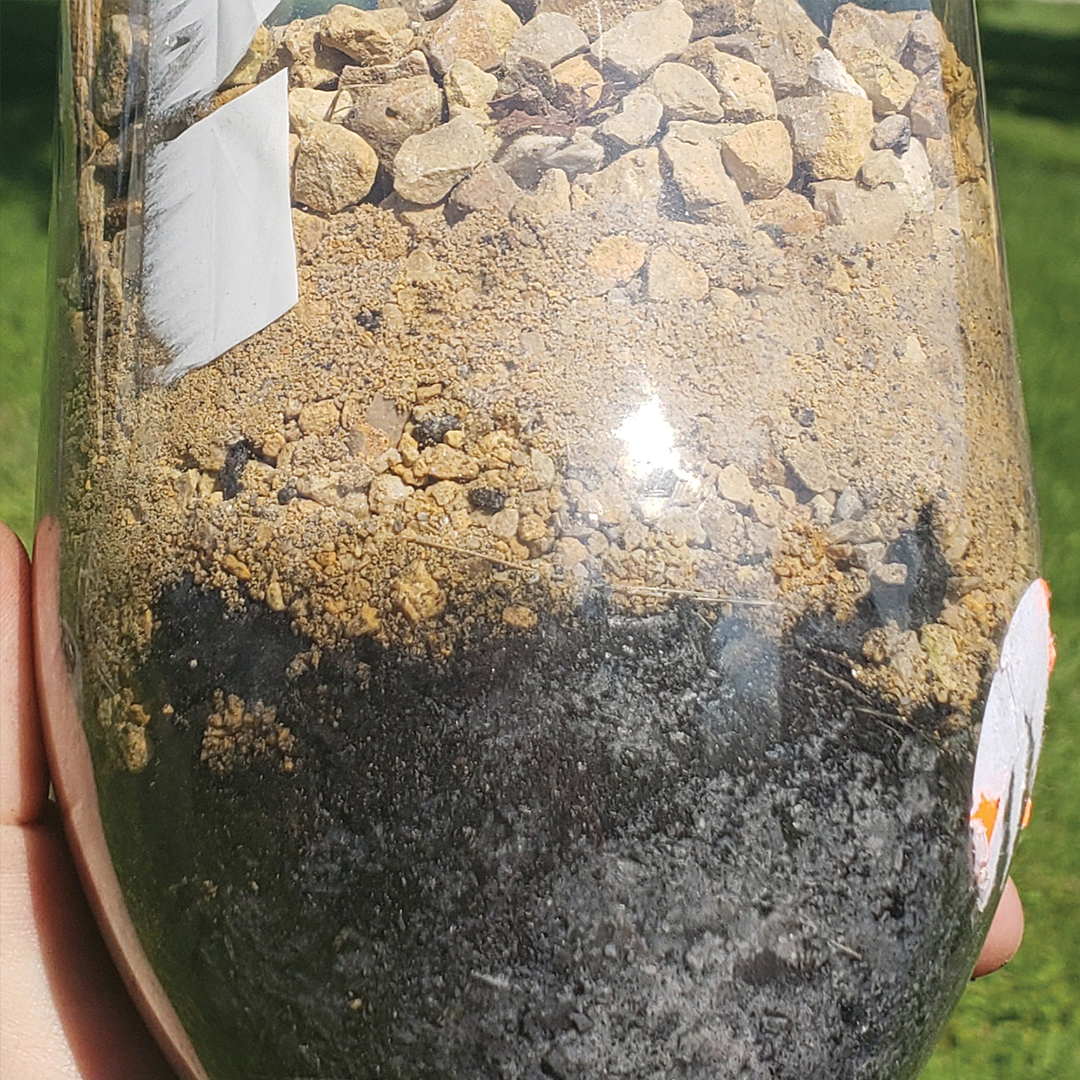
Knowing how to make a water filter so that you have access to clean water could mean the difference between life and death. There are many different ways to filter and clean water, but here is a method where the supplies used would be the most likely ones available in the outdoors. I have used this method to clean “dirty-looking” water, filtering out debris such as silt, grass, insects, soil, etc. I highly recommend that the water collected from this filter still be boiled or purified by means of purification chemicals. For the full project plans, get your copy of the Victorinox Swiss Army Knife Camping & Outdoor Survival Guide.
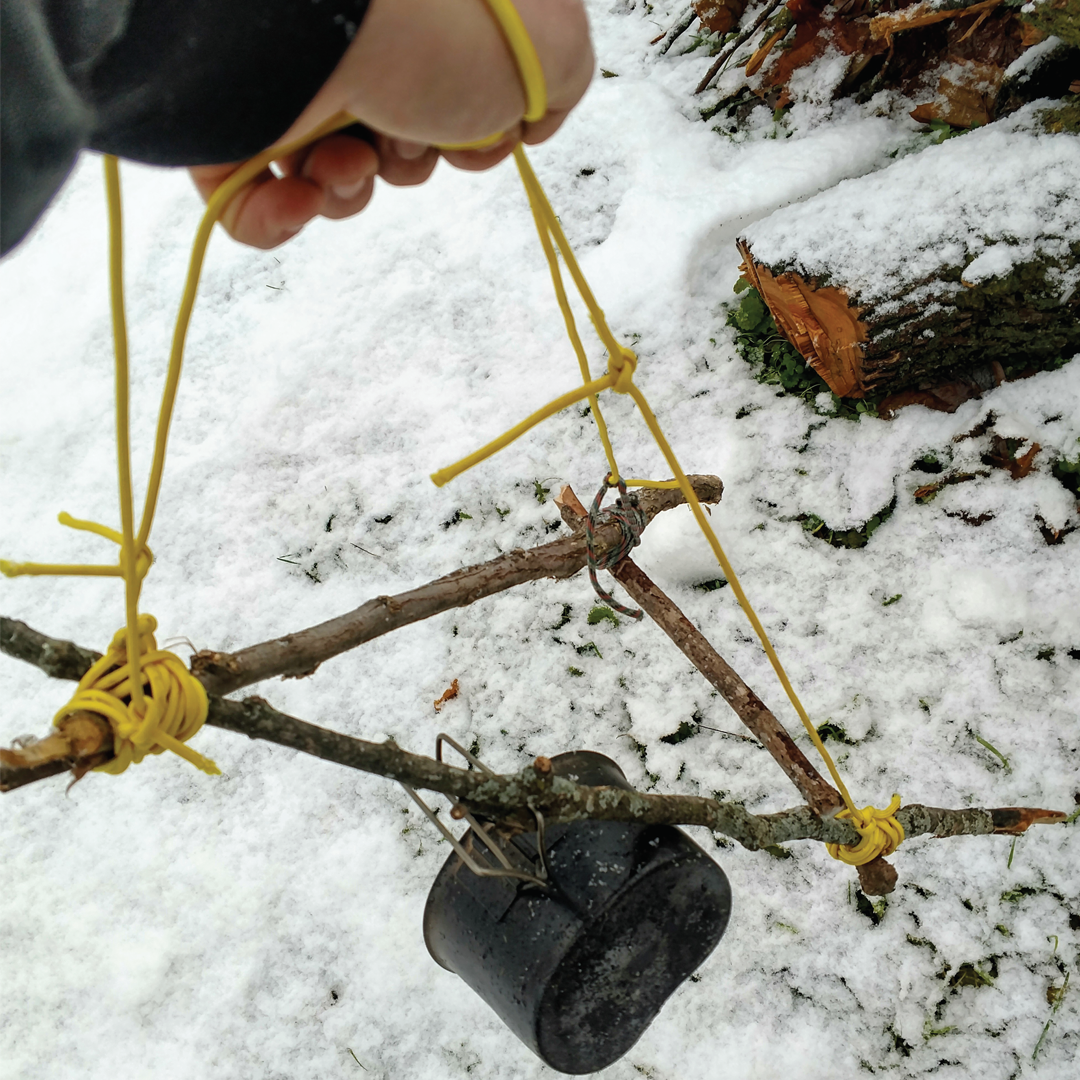
Grappling Hook
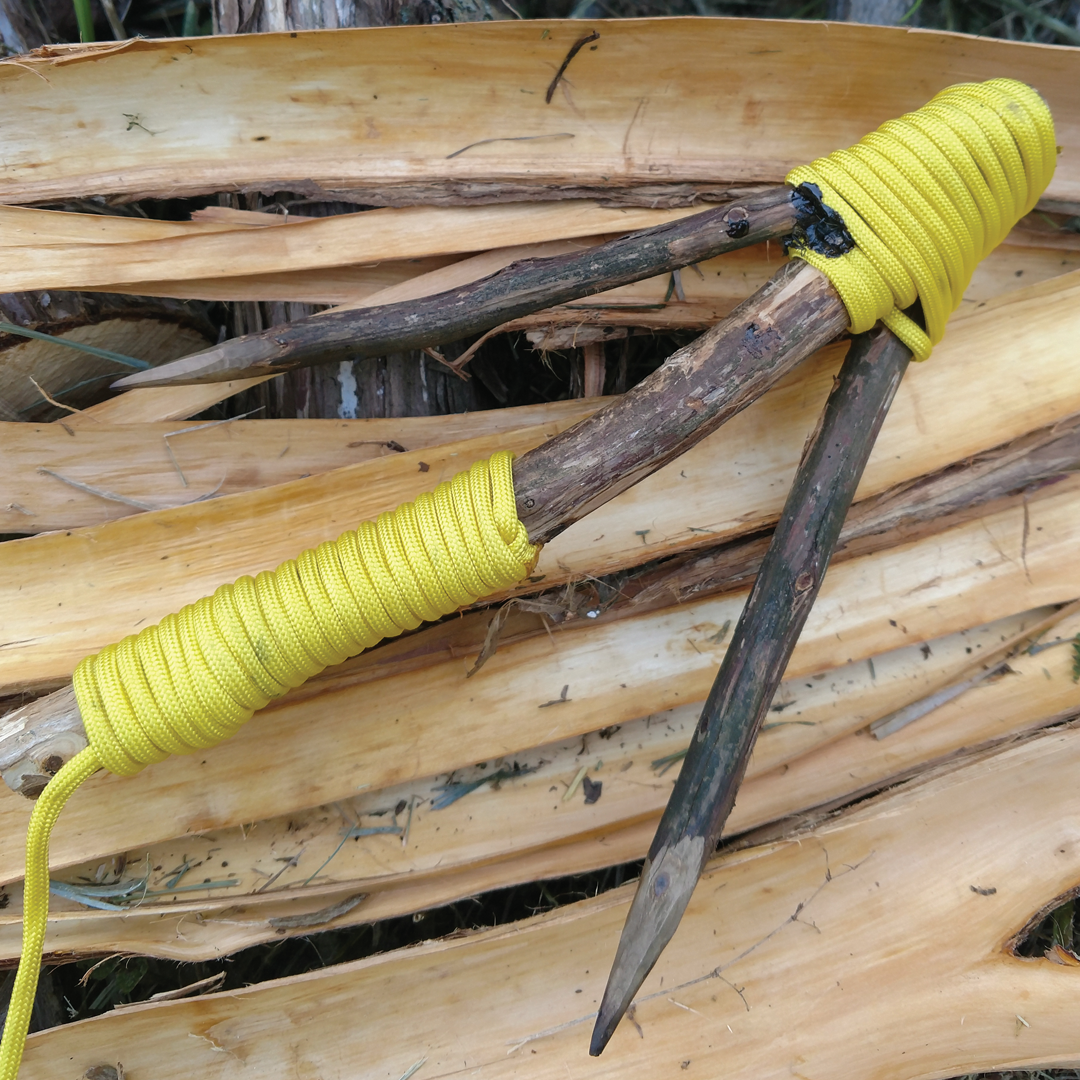
A makeshift grappling hook won’t hold your weight—trust me, I have tried—but it still comes in quite handy. It can help in heaving rope lines into trees, hanging items from them, retrieving dropped items, bringing down a bird’s nest for fire tinder, and trolling through water to obtain materials such as driftwood, aquatic plants, or anything else you may want to grab onto. In my Victorinox Swiss Army Knife Camping & Survival Guide, I will show you how to create a two-pronged grappling hook.
Aluminum Can Candle Holder
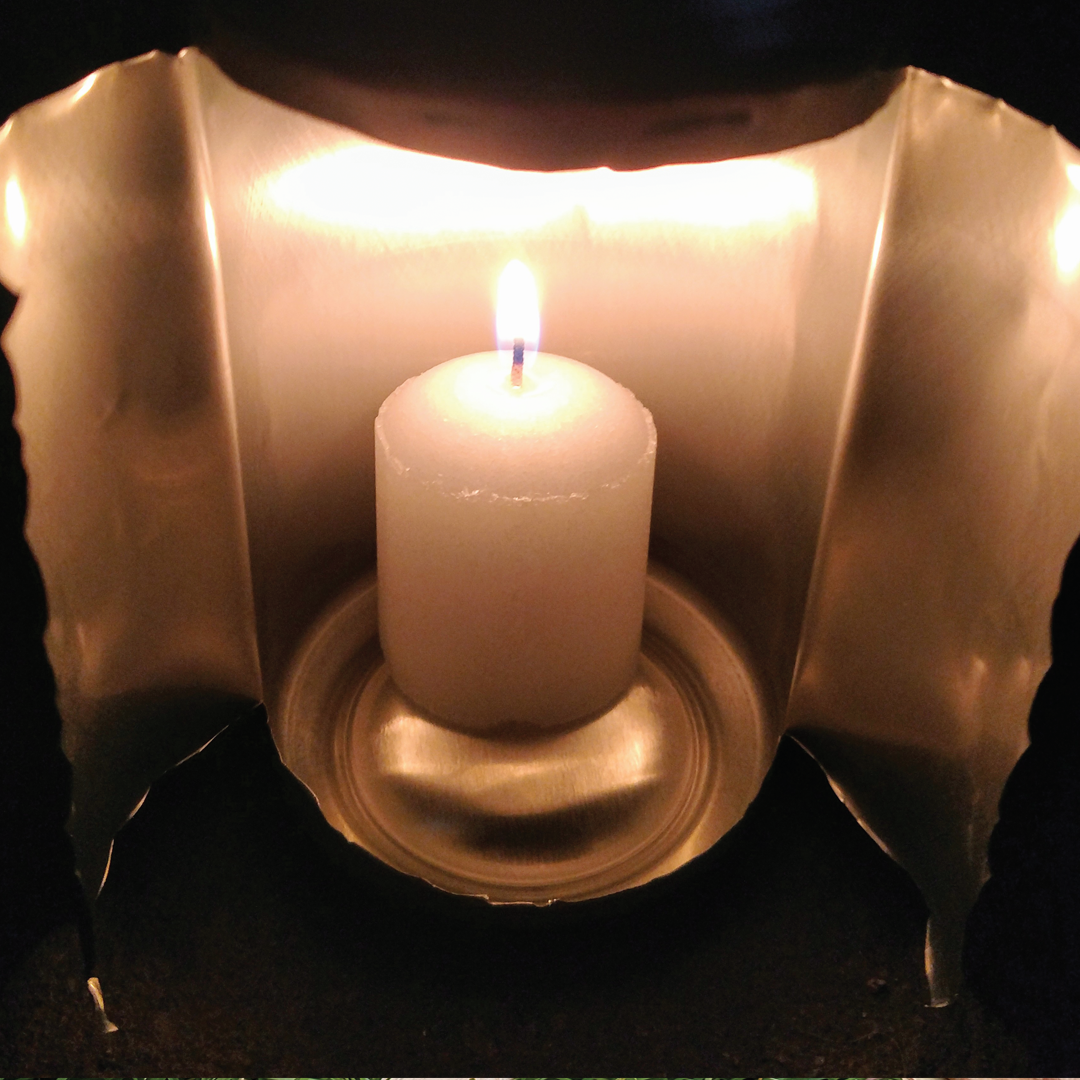
Many people will carry what are called tea candles in their packs because they are incredibly small but useful. Even though these candles are quite small, in the right conditions they can be used for cooking, lighting, and even for warming up small enclosed spaces. One problem with keeping candles lit outdoors is competing against wind and rain. An aluminum can will help protect the candle from these elements. This project might not look like it can save your life but this little survival hack can be used for cooking in the right conditions.
Bow Drill Fire Starter
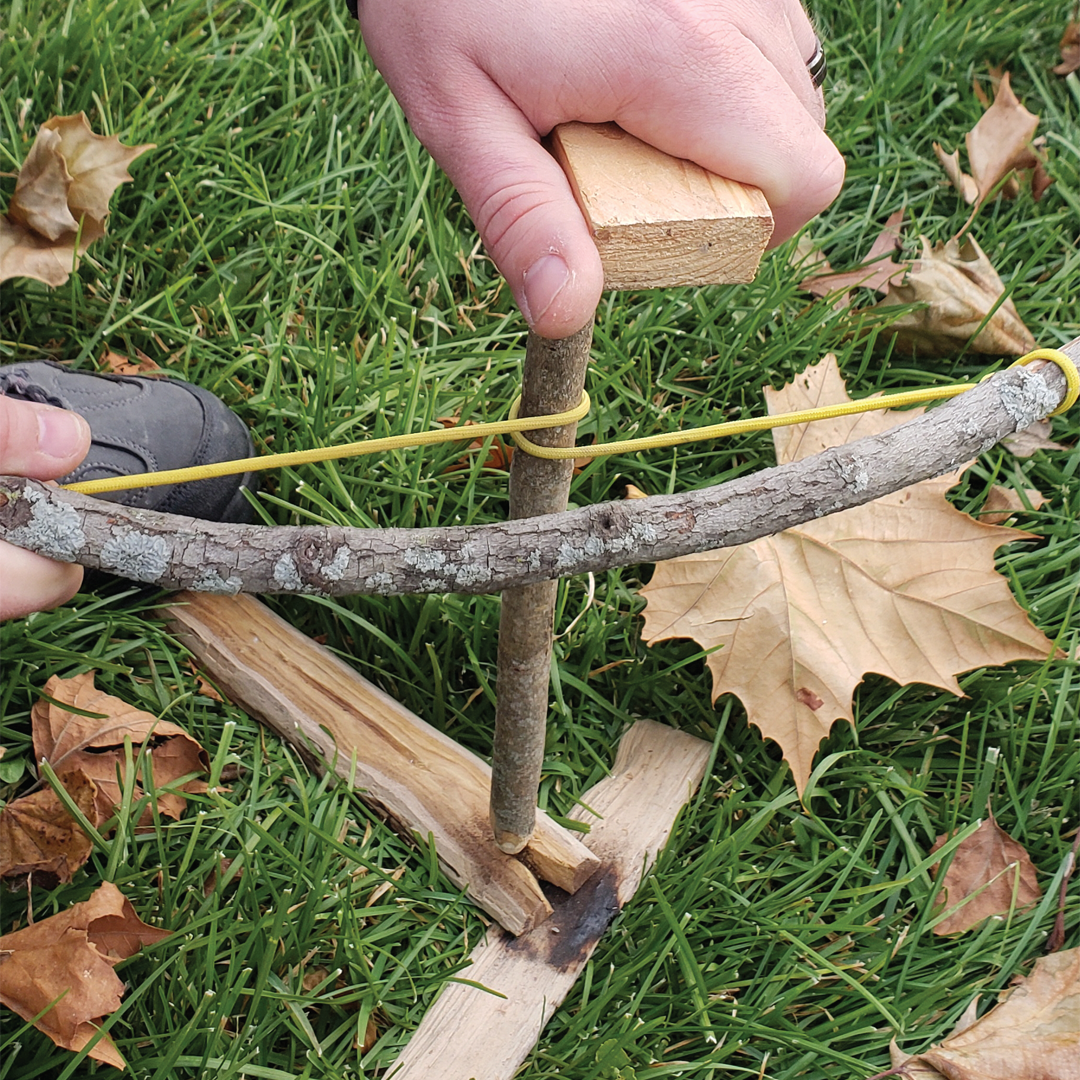
Using a bow drill is a primitive yet effective way to start a fire. It also requires a lot of patience. As with most skills, I highly recommend that this particular method be practiced before it is actually needed. Even in a controlled environment (at home), I have had difficulty getting this method to work. This is one of those “make it or break it” methods. I have produced a smoking pile of dust within a minute or two, but I have also given up after an hour of trying. Find out my tips and tricks for using a bow drill in Victorinox Swiss Army Camping & Outdoor Survival Guide.
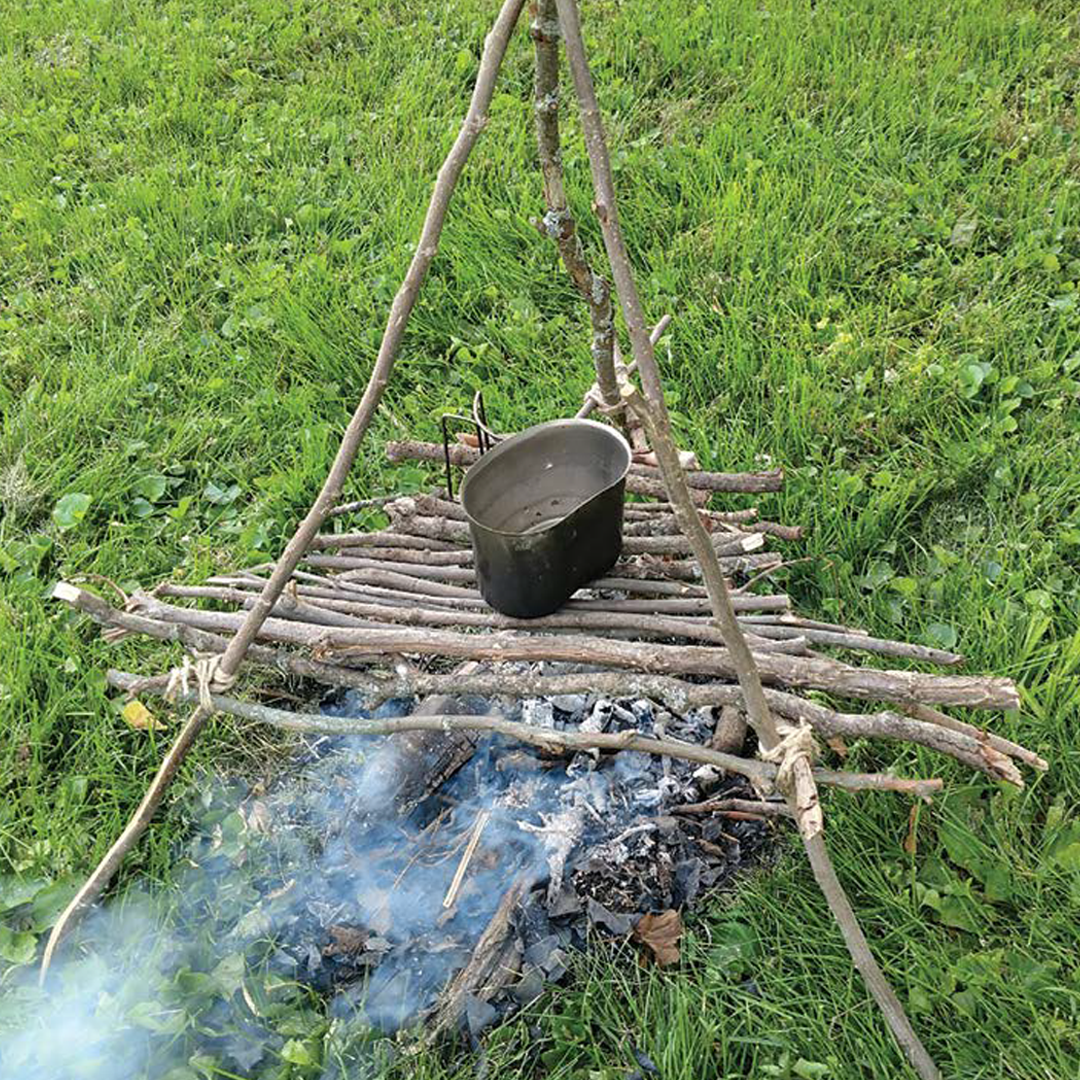
Meat Smoker
Wouldn’t it be nice to save some food for later? Smoking is an easy way to preserve meat so that you can do so. Dehydrating meat helps prevent the growth of any organisms, and the smoke creates an outer protective layer, almost like a varnish. There are essentially two methods for smoking: hot smoking and cold smoking. Hot smoking uses heat and smoke to cook the meat. It usually involves creating a structure around the fire in which to trap the heat and the smoke. Cold smoking is done more in the open, at low temperatures, with the smoke passing over the meat. The smoking process can take a long time, but it will allow the meat to be carried safely for a few extra days. This very simple drying rack can be constructed with minimal supplies.
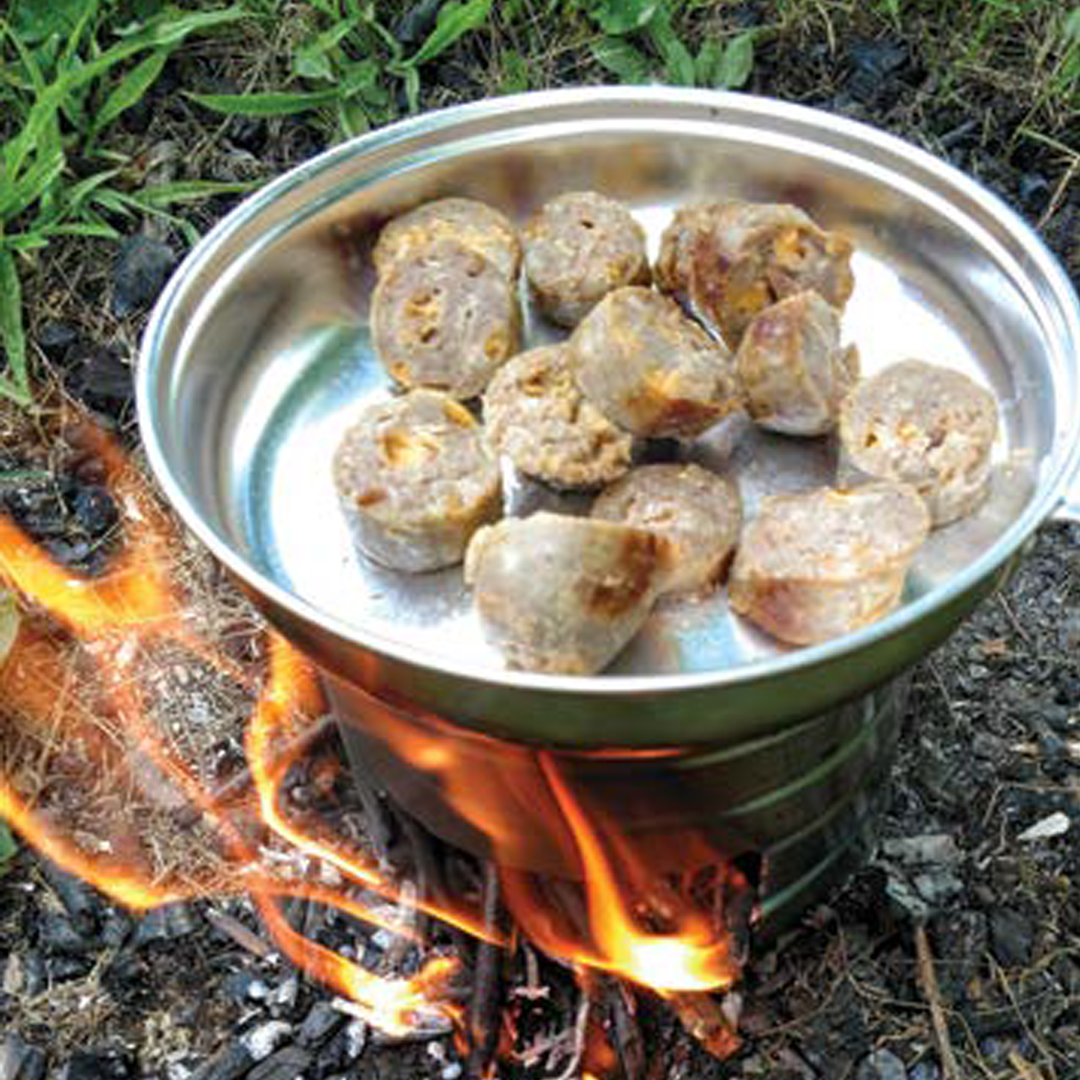
Hobo Stove
Hobo stoves were generally large metal drums that were turned upside down in order to have a cooking surface. They can also be used to warm up people huddled around them. In the survivalist community, hobo stoves tend to be made from smaller containers to create a small, portable cooking/heating source. I have used coffee, soup, and soda cans. Knowing how to make these simple stoves is a great skill to have. They are easily transported once made. And the materials needed to make one are found everywhere, as they are thrown out as trash, so these stoves cost almost nothing to make.

Key Ring Fishing Hook
Believe it or not, you can remove the key ring to fashion a small hook for fishing. It takes a little effort, but it really works! I used the key ring from one of my Tinker models to make the hook. The first time I used this technique was about twenty years ago. I discovered it not through a survival situation but out of boredom. When it comes to fishing, I am generally a catch-and-release person, and on one particular day I was catching fish left and right. It may sound odd, but it got to the point where I was catching so many fish that it became predictable and boring. I topped fishing for a bit and whittled away at a piece of wood. The key ring on the knife was clanging away against the frame as I did so, forcing me to notice it. I wondered what interesting thing I could do with it. This key ring fishing hook survival project is the result.

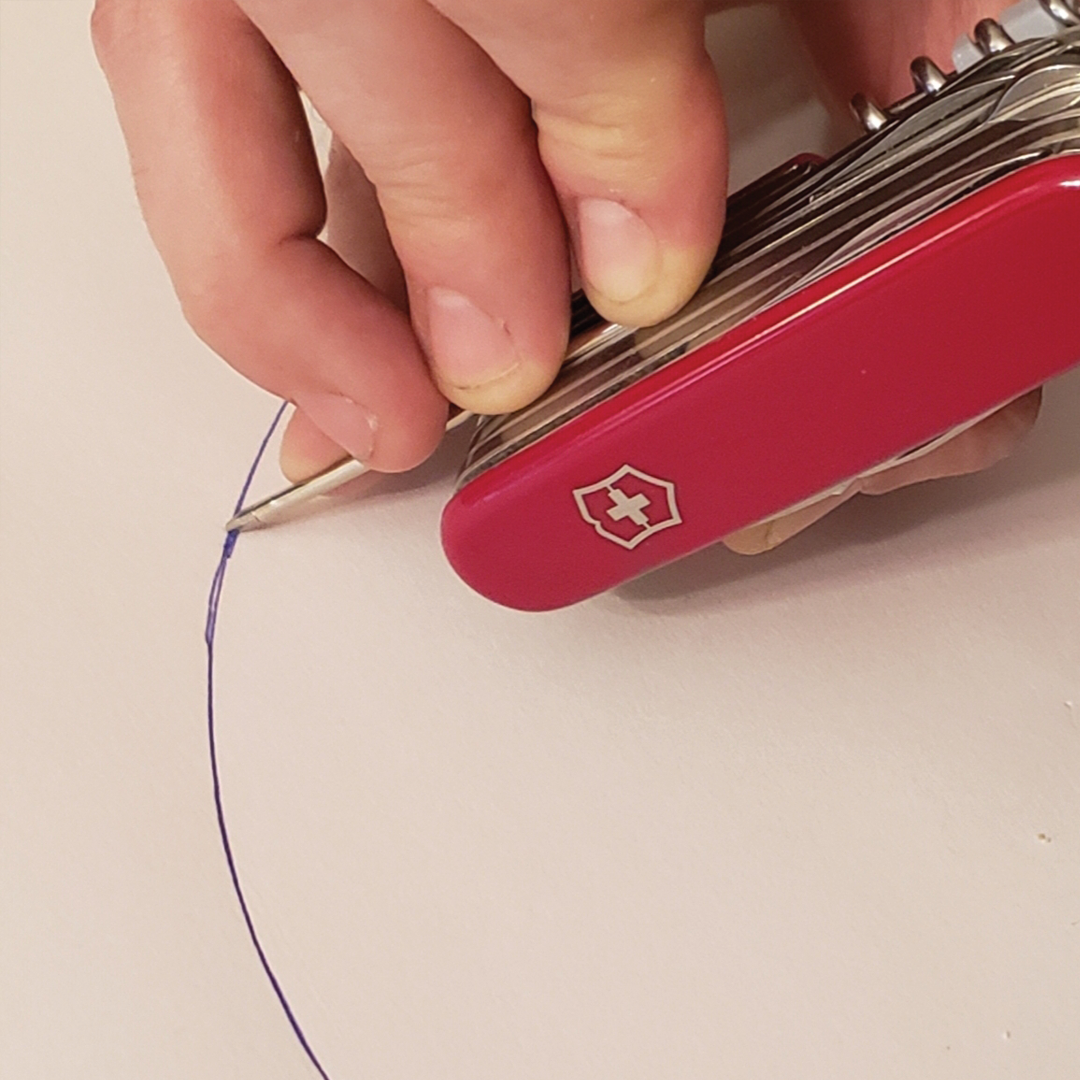
Flashlight Pouch
The reamer on a Swiss Army Knife is the go-to tool for sewing through large and tough material, such as leather and canvas. You can make a belt holster for your flashlight in order to make it more accessible. And you can make it by using only the materials that you would probably have if you were away from home. The inner strands of the paracord are going to be used for the sewing thread, while the whole piece of paracord will be used for some finishing touches. Find a step-by-step tutorial for this project in the Victorinox Swiss Army Knife Camping & Outdoor Survival Guide.
Drafting Compass
A drafting compass can help in determining distances on a map, as well as serving other functions. Since I love to write and doodle, I always have three writing utensils on me: a wooden pencil, a pen, and a marker. These items should be in everyone’s packs because they can be very useful. I suppose that is why Victorinox started including a ballpoint pen in some of their models.
Carrying Pack
You may find yourself without a pack. Perhaps it was lost, damaged beyond repair, or eaten by a bear. In any case, making a pack frame is going to be helpful for carrying supplies. There are a variety of designs and materials you can use to make a pack. With two straps, this improvised pack can be carried just like a backpack. To carry supplies, simply tie them to the frame of the pack.
Get Exclusive Email Offers And Receive 15% OFF On Your First Book Order!
Recent Comments