


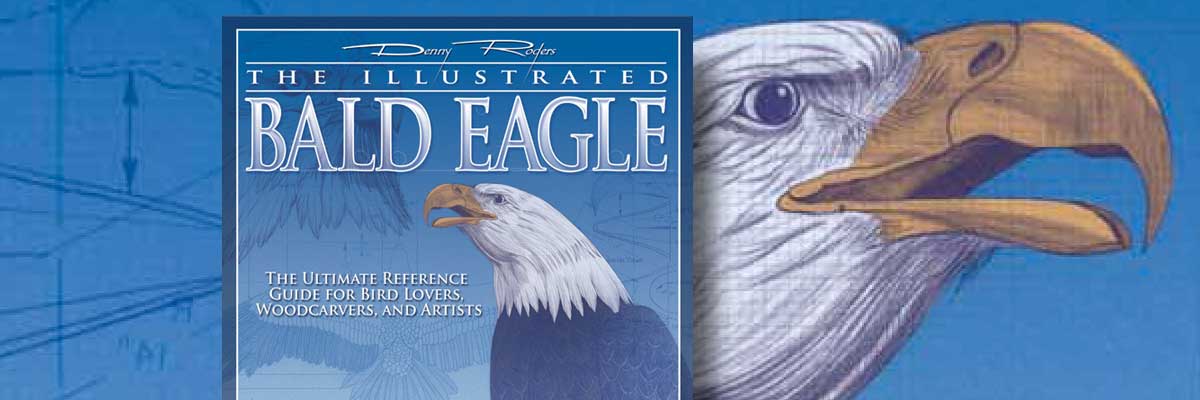
Illustrated Bald Eagle
When carving a wooden eagle the reference material is key
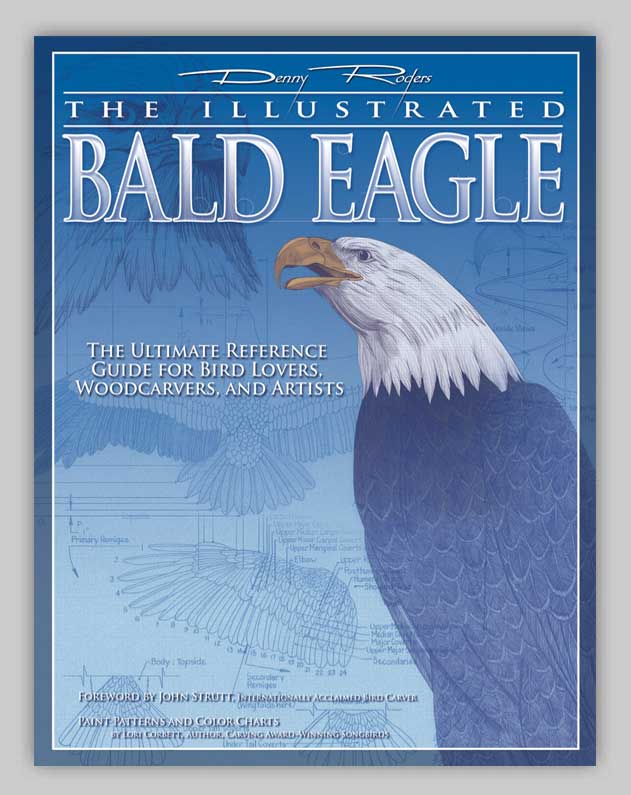
We will start with a little overview of the raptor.
The American Bald Eagle (Haliaeetus leucocephalus), our national symbol, is the only eagle unique to North America. A male weighs between 6 and 9 pounds while a female can be anywhere from 8 to 14 pounds. The Bald Eagle is 32 to 43 inches long. The nation’s regal bald eagle is a much-loved subject of wood carvers, sculptors, and artists. With an impressive 6 to 7 foot wing span, it’s no wonder this graceful bird is sought after to make an artistic statement.
In this article series I will show you how to carve the basic outline of a miniature eagle sitting on a base.
~ Cam R. Merkle
Wooden Eagle Carving Part One of Three Articles
By Cam R. Merkle
ARTICLE ORIGINALLY FROM Woodcarving Illustrated Issue 30 Spring 2005
For a beginner, carving realistic birds can be intimidating. But almost everyone has seen a bald eagle—one of the most universally loved and respected birds in North America. And seeing a live one makes carving a little easier.
In this article I will show you how to carve the basic outline of a miniature eagle sitting on a base, which can be carved as your choice of a rock, a wooden stump or a log. In our next article, I will show how to detail and texture the eagle using a power carver and wood burner. In part three of this series, I will demonstrate my finishing techniques for the eagle.
All measurements given are for the accompanying miniature pattern.
Wooden Eagle Carving: Begin the Carving
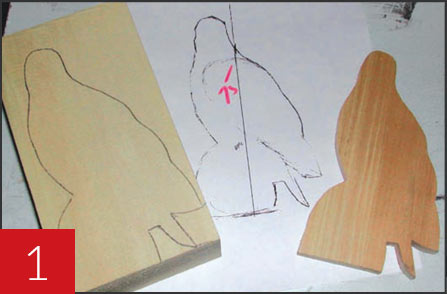
1. Cut out the side, the full back view and head patterns.
Draw on the side view by tracing the pattern through carbon paper or by cutting the pattern out and tracing around it. Cut the side profile of the blank out on a band saw. If necessary, trim the blank to exactly 2 13/16″ wide.
2. Referring to your pattern.
Draw on the vertical reference line (VRL) and the center-line.
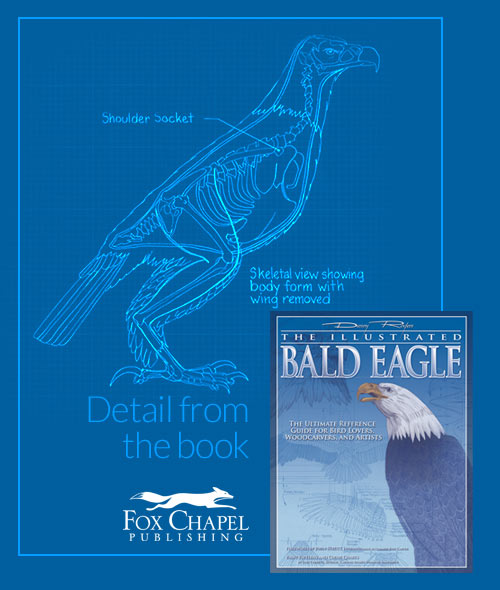
Use this drawing of an eagles’ skeletal structure to help you form the body’s shape. Keep in mind the distance between the shoulder socket to the rest of the body.
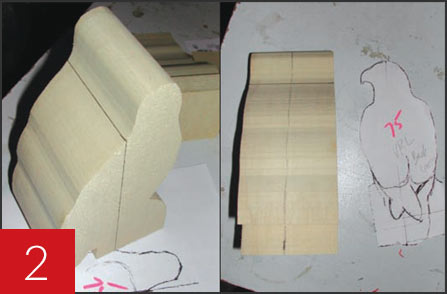
3. Using the full back view pattern.
Lay out the back, or plan view of the block. The base should be left at full width for now.
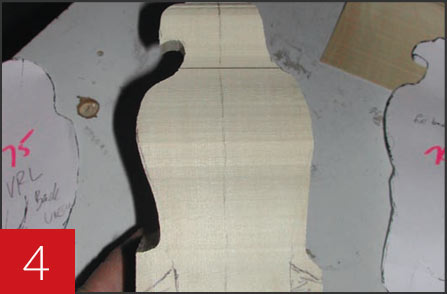
4. Remove wood outside the plan view using a band saw or a carving tool.
Leave the base full for now. If using a carving tool, make sure that the finished cut looks similar to the way a band saw would have cut the plan view.
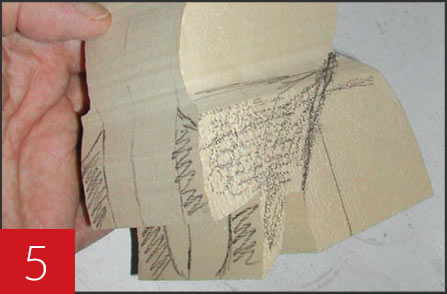
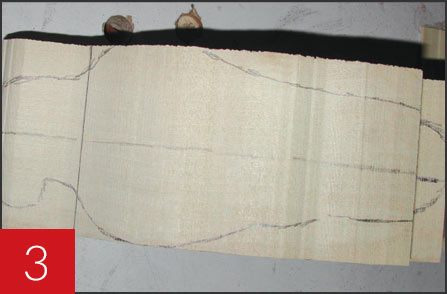
5. Sketch on the top edge of the base (both sides).
Then remove all wood in the “grayed” areas. A large Typhoon cylinder works well for this step. Re-draw any portion of the VRL you carved off so far. Also draw on the wing lines using the side template. You can lay the side template directly on the bird and use pins to poke through the template to mark the wings. Flip the template over and use the pinholes to guide you in marking in the wing on the other side of the bird. On this carving I left the bird’s left wing sitting slightly lower than the right one. You can do the same or make both wings the same height.
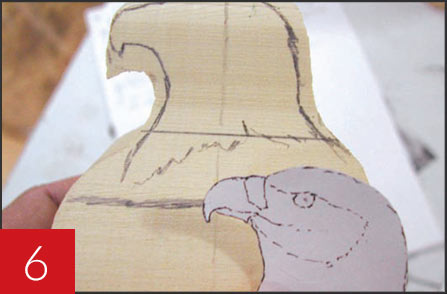
6. Carefully position the head template on the block.
With a very sharp pencil, draw on the side profile of the head. At this time you can decide if you want to raise or lower the bill to change the attitude of the finished bird.
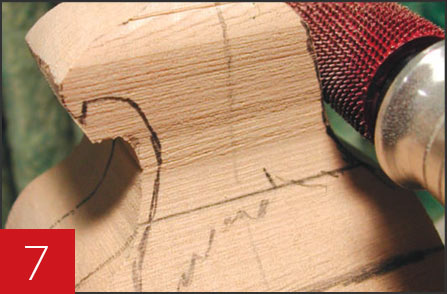
7. Carving the Head.
Very carefully carve out the head profile—all except the area under the bill.
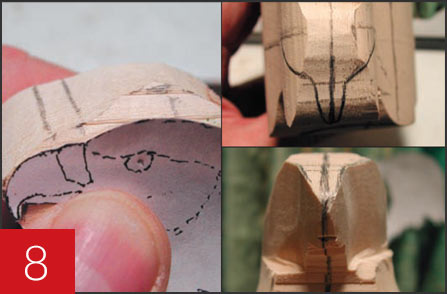
8. Draw on the cere lines.
The cere, or nostril area, is located at the base of the beak. Then draw on the center line and the top profile of the bill and head on the front half of head. Use your templates for measurements. Cut straight down from the top view lines, leaving a carved top view of the head.
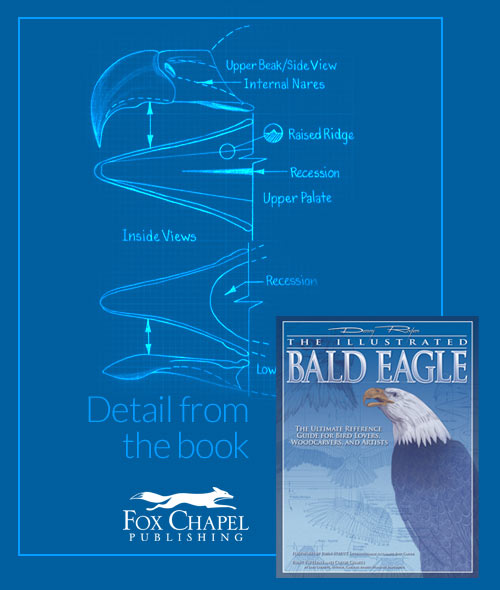
The upper beak side view below shows the position of the cere in relation to the beak point.
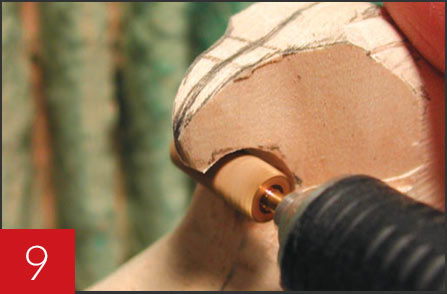
9. Re-draw the side view and the lower edge of the bill on the head.
Using a 1/4″-diameter Goldie or Typhoon cylinder, cut as close to the lower bill view as you can to establish the lower bill and throat profile. Change to 1/8″ cylinder to finish the profile more accurately. Also refine the shape of the cere and the top of the bill. Be sure to also carve the throat area so that it transitions into the body smoothly.
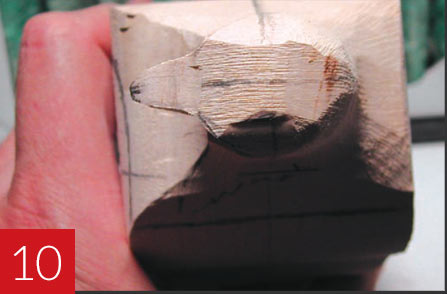
10. Shaping the head.
Round off the back of the head as you would see it looking straight down on the piece.
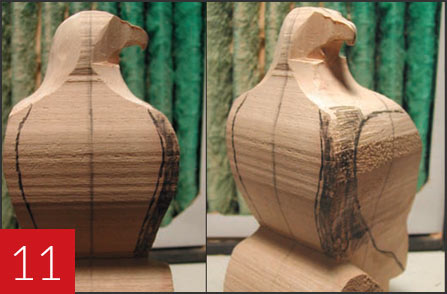
11. Begin Shaping the eagle
Looking at the block from the front, draw a line approximately 1/4″ in from each side. Now remove wood from the front of each wing to the lines on the front of the bird (grayed areas). This cut will define the width of the chest, and leave the front edge of the wings visible (see right). I actually carved the left wing a bit deeper than 1/4″ so it protrudes a bit more than the right wing.
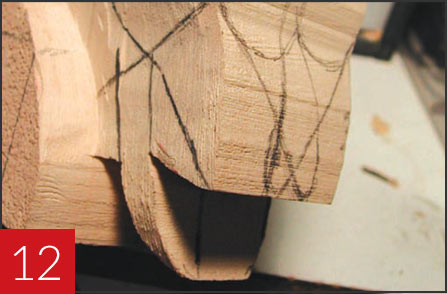
12. Draw in the primaries, or wingtips.
Then draw a line as shown. Finally draw on the side tail lines. For the purpose of these instructions, the “primaries“ refer to the entire visible length of the primary feathers. “Wingtips” refer only to the very tip of the primaries, after they cross.
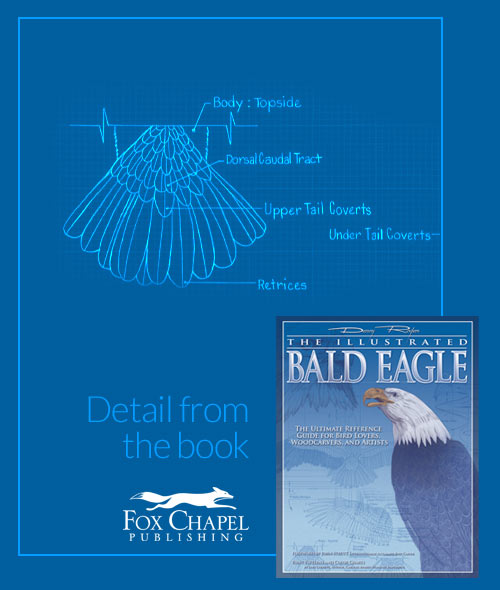
The primaries are layered with the dorsal caudal tract, upper tail coverts, and the retrices.

13. Removing wood
Remove all wood in the grayed areas. Your finished cut should resemble the two insets. The top of the tail should remain flat for now.

14. Working the eagle wings.
Draw a line approx. 1/2″ above the lower edge of the wings on either side(see Step 16). This line represents the widest point of each wing. Round the back of the bird from these lines to the center line on the back of the bird using a large cylinder cutter or a knife.
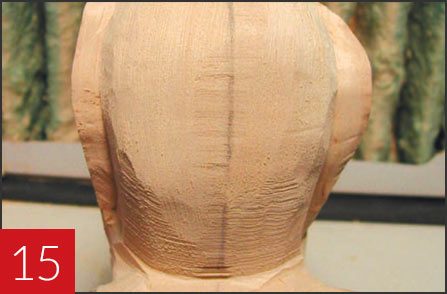
15. Continue Shaping the eagle.
Round off the breast/chest area from the front center line to the inner edge of the wing. Be sure that the belly is rounded all the way down to the top of the base. Note that the left wing is down a bit lower on my bird.
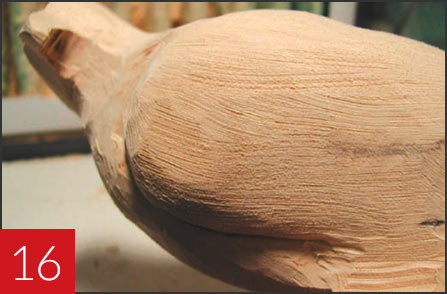
16. Working the wooden eagle profile.
With a 1/4″ cylinder, carefully define the top edge of each wing where they meet the shoulder. Then round the front edge of each wing from the lines instep 14 to the inner edge of each wing. Then draw on the front view of the shape you want for the base. Cut out the front profile, then round off the base. Be sure to re-draw the VRL when finished. The carving is now roughed-out. The basic shape and attitude of the bird should be apparent at this stage.
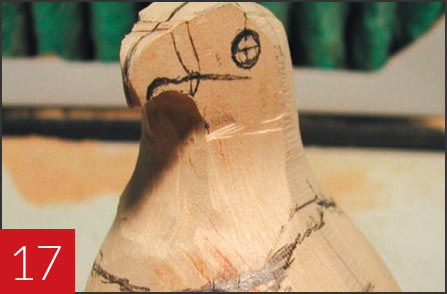
17. Begin the rough details.
Draw on the bill detail and eye placement, along with the lower edge of the white head feathers.
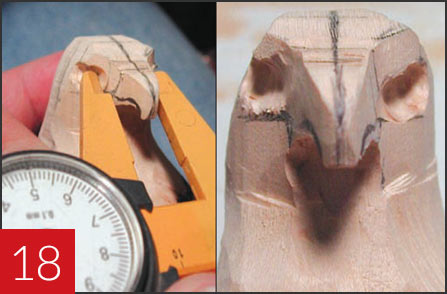
18. Measuring your reference.
The head needs to be carved to the proper width at the eyes. The eye socket is 18mm wide at the rear of the eye and 12.5 to 13mm wide at the front of the eye. Use a small bullet-shaped cutter and cut only in the eye channel, being very careful to leave a pronounced “brow” above the eye. The base of the bill should be 10.5 to 11mm wide at the cere. Carve it to size now, being careful to remove small amounts of wood from each side of the bill so that it stays straight and symmetrical.
Here are some drawings to help you with the head shape and expression of your eagle:
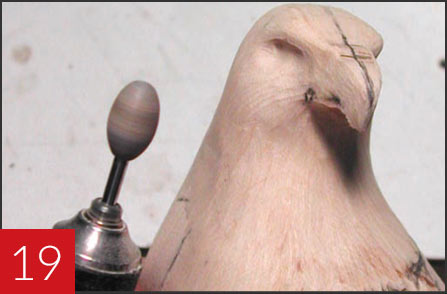
19. Shaping the eagle head.
Round off the overall head, being careful to leave the brow. Also be sure that the lower part of the head gets gradually wider at the neck. I like using an egg-shaped ruby carver for this step. Be sure to refer to your reference for the correct roundness to the head.
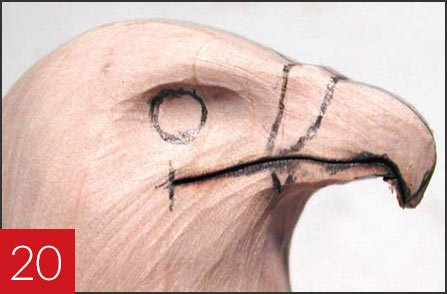
20. Pencil on details.
Redraw any bill detail as necessary. Also draw in the eyes again as well as the line on the bill that separates the upper and lower mandibles. Look at the mandible separation lines directly from the front to be sure they are even looking. Carefully burn in this mandible separation line with a fine, sharp wood burning tool. Be careful to burn a clean, crisp single line on each side of the bill. Burn right back to the rear edge of the gape.
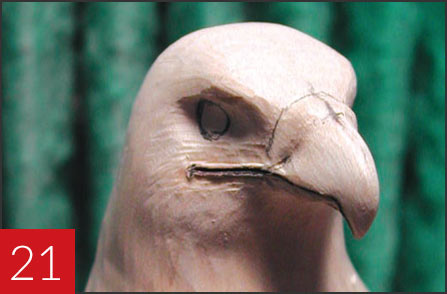
21. Keep details centered.
Round off the upper edge of the bill and cere. Be sure that the roundness of the bill and cere continue up into the forehead. Redraw the cere lines once the top of the bill is carved. Narrow the lower mandible below the burn lines slightly before carving the underside of the lower mandible. Use a small pointed brown stone or ceramic stick. Carve in the wood around the “lip” — along the gape, leaving the fleshy “lip” raised approximately 1/32″.

22. Eagle head feathers.
Redraw the lower edge of the white head feathers as necessary. Carve away 1/32″ to 1/16″ of wood below them, then smooth out the area below this cut to remove any groove. I use a #20 Ruby carver.
23. Continue detail placement.
Sand the head smooth in preparation for setting the eyes and drawing on the head feathers. Draw in the nostrils. The nostrils are carved in with a small sharp cutter—I like the tiny “football” shaped Goldie. Carve in the eye holes with a small diamond cylinder, making them just slightly larger and deeper than the eyes. This pattern uses a 5mm pale yellow eye.
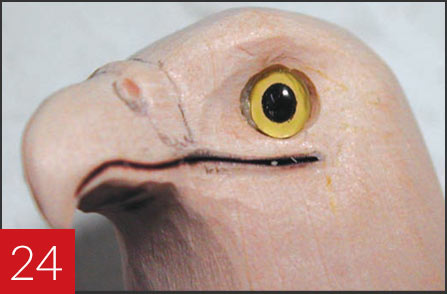
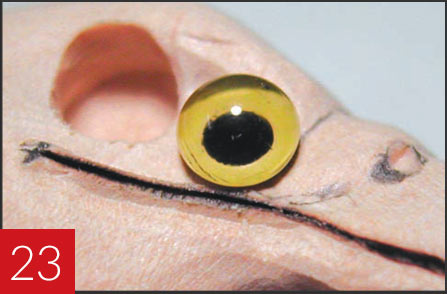
24. Fitting the eyes to the eagle carving.
Test fit the eyes to make sure they fit into the hole all the way and that they come out easily. Mix up a small amount of two-part epoxy putty (I use Kulis Karvit). Place a small ball of putty into the eye hole so that it almost fills the hole. Place the eye on the putty and carefully and slowly push the eye into the putty. Bit by bit, using a toothpick, remove any excess putty that squishes out from behind the eye. Check the eye angle frequently and stop when the eye is set to the correct depth and angle, shown above. Then remove any excess putty around the eye. Repeat for the other eye.
Here are some drawings to help you with the head shape and expression of your eagle.
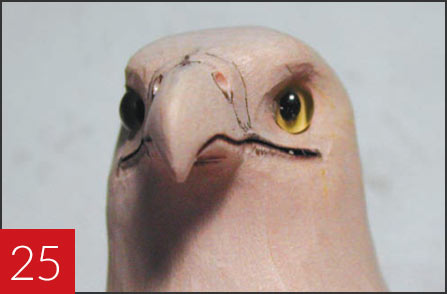
25. Attaching the eyes.
If you let the putty set overnight, you will have less risk of moving the eye when you put the ring around the eye. I generally detail the eye ring immediately, being careful not to put too much pressure on the eye, with excellent results. Whether you let the putty set up first or not, the eye ring procedure is the same. Roll out a very fine “string” of putty between your hands. Carefully place it around one eye. Work the string into the edge of the eye using a damp round toothpick.
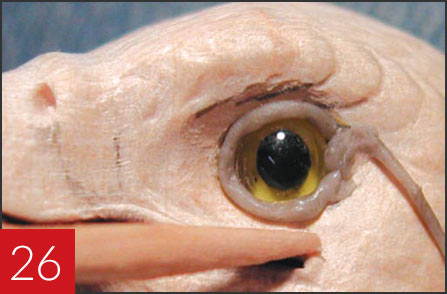
26. Reference and eye placement.
Once the putty has been attached, complete the detail around the eye. Refer to your reference. Repeat the same procedure on second eye.
WOODEN EAGLE CARVING: Materials & Tools
MATERIALS:
- Basswood, jelutong or tupelo 2 13/16″ x 4” x 6 3/4″
TOOLS:
- Band saw
- Power carver
- Carving knife
- Large Typhoon cylinder
- 1/4″ Typhoon or Goldie cylinder
- 1/8″ Typhoon or Goldie cylinder
- Small football-shaped Goldie
- Egg-shaped ruby carver
- #20 ruby carver
- Small pointed brown stone or
- ceramic stick
- Small diamond cylinder
- Small bullet-shaped eye punch
- Wood burner
- Fine wood burning tip
ACCESSORIES:
- Two 5 mm pale yellow eyes
- Two-part epoxy putty
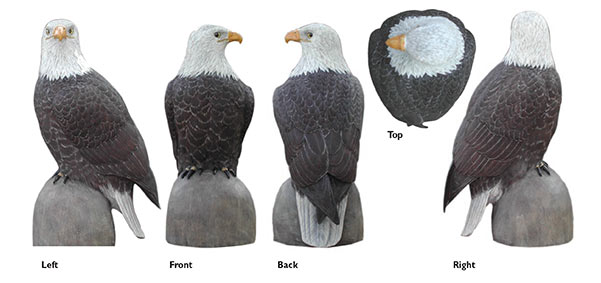
Seeing an eagle in action or referring to diagrams of an eagles will make your wooden eagle carvings a little easier. Illustrator, sculpture, and author of the Illustrated Bald Eagle Guide, Denny Rogers has been a life-long outdoors-man and wilderness enthusiast that studies all types of birds including bald eagles. His findings are reflected in his comprehensive reference guide that includes detailed structural drawings that deliver every realistic element of the bird – down to each feather. For more carved wooden eagle diagrams and drawings, check out The Illustrated Bald Eagle.
Other Wood Carving Titles
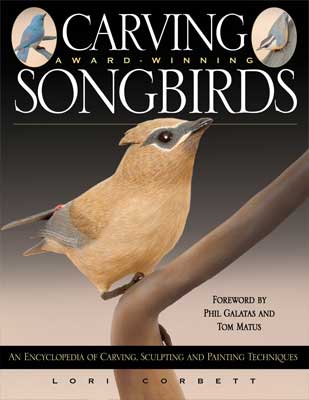
Carving Award-Winning Songbirds
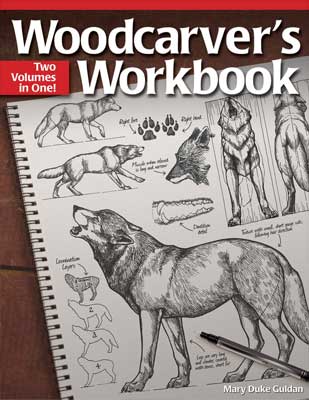
Woodcarver's Workbook
Get Exclusive Email Offers And Receive 15% OFF On Your First Book Order!
About the Books
Ultimate Reference Guide for Bird Carvers, Artists, and Craftsmen of All Types
Each book includes Denny Rogers’ highly detailed renderings, full scale dimensions, color photographs, and anatomically correct patterns that will spark your creativity. From proportion charts to exclusive color charts with pant references, this book will help you create your next masterpiece.
thanks for the information