


DIY Wooden Clothes Hanger: A Beginner Woodworking Project
By Geoffery Fisher from Slingshots and Keyhooks
After a tree in my garden came to the end of its natural life, I wanted to preserve some small part of it and the branches suggested the shape of hooks. This discovery provided me with a new and exciting adventure of working with unseasoned wood. This type of wood is known as green wood because it still contains a lot of moisture. It is also much softer than seasoned wood, which means it is much easier to work but is less stable, so it can crack and warp. For these small-scale projects, though, this isn’t a problem, and can even add to its appearance.
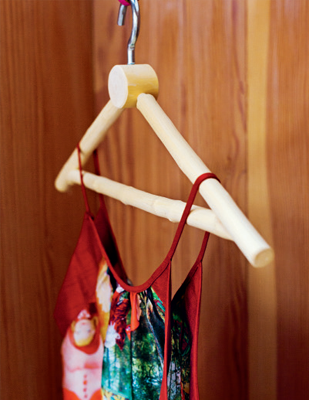 A clothes hanger is one of those classic pieces of modern design that is recognizable across the world. The clothes hanger in this project might bear some resemblance to the store-bought ones you have in your closet, but by the very nature of the material you are going to use, the finished work will look like no other. In this example, I decided to use some pieces of sycamore that I collected while in bloom when they could be easily stripped of the bark to reveal a bonelike surface that was smooth to the touch and so ideal for hanging clothes on. If you decide to make a hanger with the bark left on, any of the suggested species would be suitable as long as the surface is not too rough for use—otherwise it will damage your clothes.

Slingshots & Key Hooks
From a wood slingshot to a bee hotel, this unique woodworking book beautifully illustrates how to transform foraged wood into easy woodworking projects. Author Geoffrey Fisher presents 15 step-by-step projects, how to prepare “green” wood, including spotting tree diseases, drying, and stripping of the bark.

Wood & Steam
Steam-Bending Techniques to Make 16 Projects in Wood
Complete Book of Woodworking
Step-by-step Guide to Essential Woodworking Skills, Techniques and Tips

Birdhouses, Boxes & Feeders for the Backyard Hobbyist
19 Fun-to-Build Projects for Attracting Birds to Your Backyard

From Tree to Table
How to Make Your Own Rustic Log Furniture
Tools
- Bench Vise
- Bench Hook
- Pull Saw
- Pencil
- Ruler
- Cordless Drill
- Tenon Cutter
- 1/8″ (3mm) and 3/8″ (10mm) Brad Point Woodworking Bits
- Sanding Block
- Countersink Bit
- Screwdriver
Materials
Materials
- Your choice of wood: Ash, Hazel, Beech, Sycamore, Yew, Cherry, Oak, or Birch
- Two-Part Epoxy Glue
- Two 1/8″ (3mm) Countersunk Wood Screws
- Galvanized Screw Hook
- Wood Screws
Wooden Clothes Hanger: DIY Woodworking Project
1. Selecting the Wood.
You will need three different thicknesses of green wood to make this project, the first of which will form the central component. This central component needs to be cut from a piece of greenwood approximately 1 3/4″ (45mm) thick and 1 1/8″ (30mm) in length. The second thickness you will need forms the arms, and the third the crossbar. Both need to be reasonably straight and should measure approximately 5/8″ (15mm) and 3/8″ (10mm) respectively in thickness.
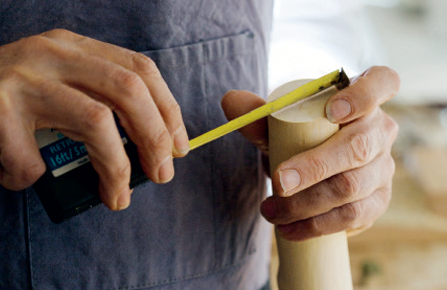
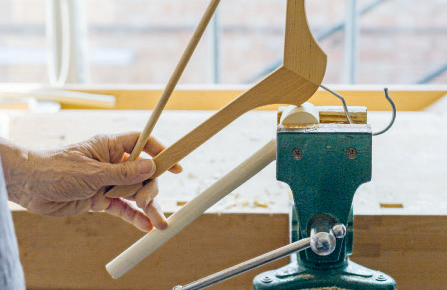
2. Measuring the Arms
Before cutting the tenons, you need to measure the length of the arms by using an existing clothes hanger as a template. You should allow a little extra wood for the arm tenons.
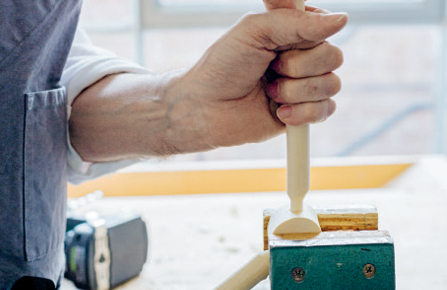
3. Make a Tenon at One of each of the Arms
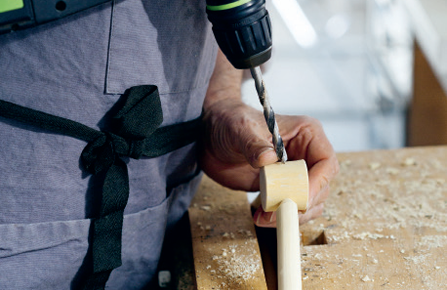
The safest way to make the top is to cut an oversized length of greenwood so it can be firmly held in the vise and then cut it to the finished size at a later stage. Ensure that the drill holding the tenon cutter is in line with the section of greenwood both from the side and top and that it is held securely in the bench vise. Before you start the cut, the drill should be set to slow. If using a variable-speed drill, start slow and then increase the speed as the cut is made to form the tenon. As this is such a small item, it’s worth taking care to get a smooth cut, as any imperfection will be obvious.
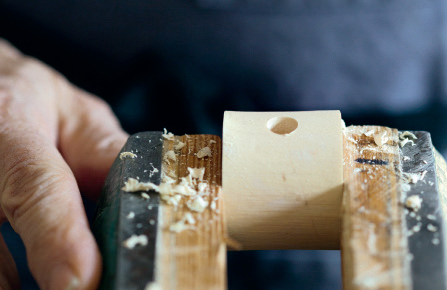
4. Form the Mortices.
I used a 3/8″ (10mm) tenon cutter to make these joints, so I needed to drill two holes to form the mortices using a 3/8″ (10mm) brad point drill bit. These mortices need to be drilled in two separate stages to accurately calculate the angle between the arms. The first one should be drilled at right angles along one side of the central component to the estimated depth of the tenon.
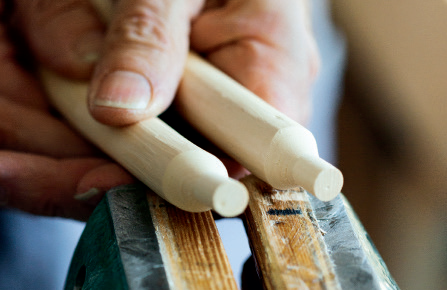
5. Joining the Arms.
Taking one of the tenons, cut it to length so that it is no longer than the depth of the mortise. Once this has been done, it can be glued into place and left to dry. You are now ready to calculate the angle at which you need to drill the second mortise, by securing the work in the bench vise and once again using an existing clothes hanger as a template. Position the work in the bench vise so a second mortise can be drilled from an upright position. The second tenon can then be cut to length and glued into place.
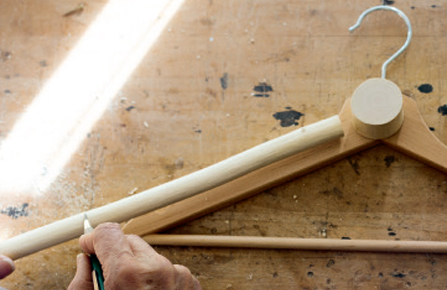
6. Preparing the Crossbar.
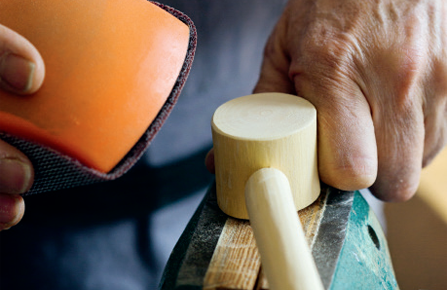
Mark the cuts needed to fit the crossbar by holding the piece in position and drawing a pencil line at each end. Using the bench hook and pull saw, cut the crossbar to length, then drill a screw clearance hole in each end with a 1/8″ (3mm) brad point bit. Before permanently fitting the crossbar into position, smooth over all edges with the sanding block.
7. Fitting the Crossbar.
While holding one end of the crossbar into position, permanently secure the other end with a 1/8″ (3mm) countersunk wood screw, and then permanently secure the remaining end.
8. Fitting the Screw Hook.
The screw hook needs to be positioned centrally at a right angle into the central component so it balances well when hung up on a rail. To avoid splitting, drill a pilot hole slightly smaller than the diameter of the screw hook, and then carefully screw it in.
More Projects in Slingshots & Keyhooks
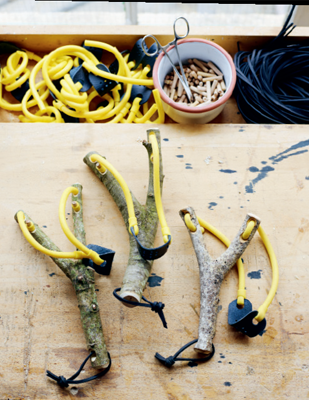
Slingshot
In addition to such games as shooting at cans and bottles, a sling shot is a practical way to launch seedballs onto inaccessible rough ground or fishing bait into water.
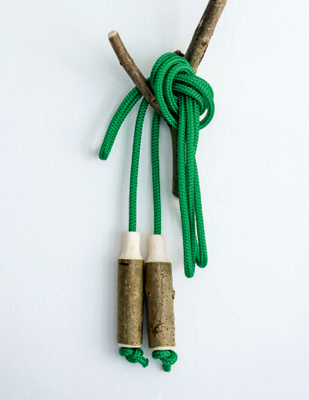
Jump Rope
Not only is this simple project a good introduction to working with coppiced wood, but it might also encourage you to take up an
exercise that can be done indoors or out.
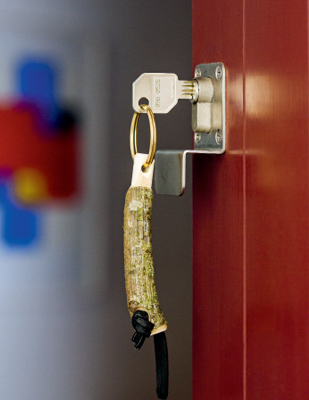
Key Chain
This project will enable you to make good use of some of the most interesting shapes and sizes of unseasoned hardwood pieces that you might otherwise leave behind when out gathering.
Get Exclusive Email Offers And Receive 15% OFF On Your First Book Order!


Recent Comments