


The Complete Guide to Building Your Woodworking Workbench
Workbench Plans for your Woodshop or Garage
From The Complete Book of Woodworking
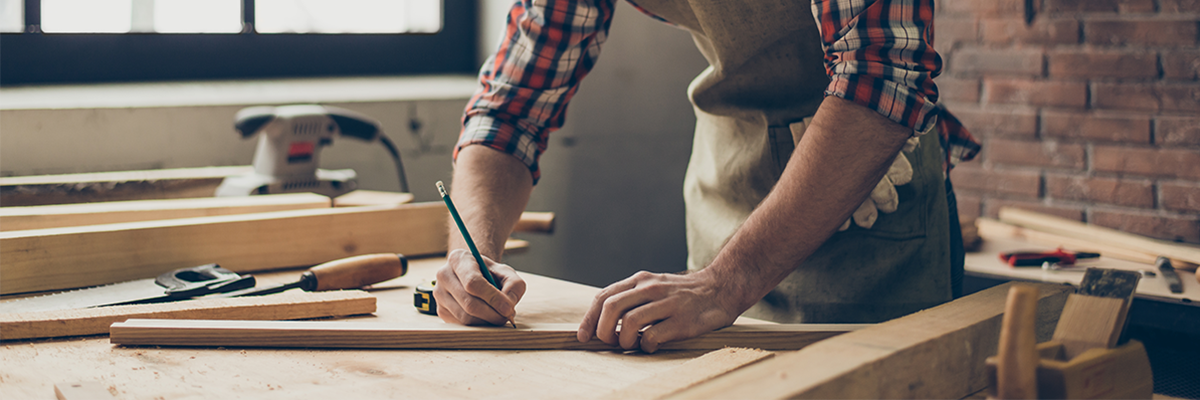
Your workbench sets the tone for your workshop. From a discarded kitchen table or an old door laid across a pair of rickety sawhorses to a gleaming oak masterpiece that looks too fancy to dine on, much less work on, there are just about as many styles of benches as there are woodworkers. The maple workbench built in this chapter is stylish enough for showing off, but it’s designed to be used — and used hard. The design is simple enough that you can easily modify it to meet your special needs or tastes.
The Complete Book of Woodworking
If you can dream it, you can build it with The Complete Book of Woodworking! This 480-page comprehensive guide will be the best tool in your workshop with 40 woodworking project plans, woodshop set up layouts, safety tips, table saw techniques, perfect wood finishing, how to use tools, how to make wood, and all about wood types. Written for both beginner and advanced woodworkers, The Complete Book of Woodworking features 1,200 step-by-step illustrations and photographs to walk you through the process of each project.
Building Time:
Preparing Stock: 4-6 hours
Layout: 2-4 hours
Cutting Parts: 4-6 hours
Assembly: 4-6 hours
Finishing: 1-2 hours
Total Hours: 15-24 hours
Tools Needed:
- Surface planer
- Jointer
- Table saw
- Band saw or jigsaw
- Circular saw
- Straightedge cutting guide
- Bar or pipe clamps
- Drill
- Belt sander or hand plane
- Combination square
- Doweling jig
- Drill guide
- Socket wrench and sockets
Shopping List:
- (4) 6⁄4 x 6 in. x 12 ft. hard maple boards
- (3) 6⁄4 x 4 in. x 8 ft. hard maple boards
- (2) 4⁄4 x 4 in. x 6 ft. hard maple boards
- (1 or 2) woodworker’s bench vises
- (4-6) 3⁄4-in.-dia. brass bench dogs with square tops
- Wood glue
- #10 x 11⁄2-in. wood screws
- 3⁄8 in. lag screws (11⁄2 in.,
- 2 in., 3 in.) with washers
- 1⁄2 x 2-in. fluted dowel pins
- Finishing materials
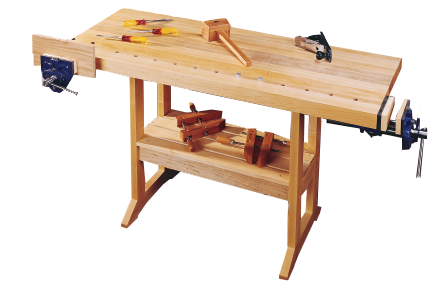
Step-by-Step Workbench Plans
1. Build the Laminate Benchtop
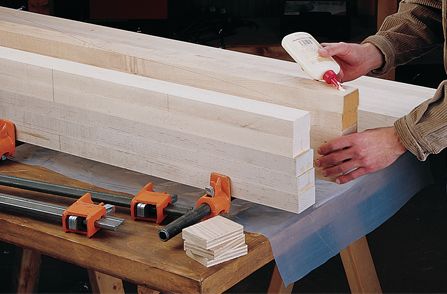
Face-joint 6⁄4 hard maple stock to create smooth surfaces on both faces. This will result in boards not quite 11⁄2 in. thick, but it’s far more economical (and less time-consuming) than reducing 8⁄4 stock to 11⁄2 in. thick. Prepare enough stock for 16, 62-in.-long x 21⁄2-in.-wide boards. Joint one edge of each board, then rip-cut them into 21⁄2-in.-wide strips. Cross-cut the boards to 62 in. long. Lay out the wood strips side-by-side, 21⁄2 in. high, on a flat worksurface. Clamp the strips together with a bar or pipe clamp, making sure the edges are all flush on the top surface of the benchtop. Draw reference lines 8 to 10 in. apart across the top, perpendicular to the joints, and number the boards in sequence. Unclamp the boards and divide them into groups of four or five boards. Apply glue to the mating wood faces and glue up each section. Use bar or pipe clamps to draw the boards together, and keep the edges of the boards flush. Glue the sections together to create the benchtop. Alternate bar or pipe clamps above and below the glue-up to equalize clamping pressure. Leave the clamps on until the glue cures.
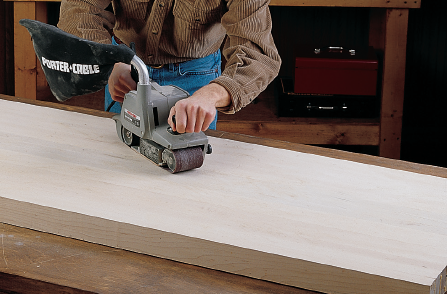
2. Drill guide holes for the bench dogs
Scrape the dried glue from both sides, and level the top and bottom surfaces using a belt sander or hand plane. If using a belt sander, avoid sanding belts coarser than 100-grit, and make initial sanding passes diagonally across the glue joints. If using a hand plane, plane diagonally across the grain until the surface is flat, then plane with the grain. Finish smoothing with a cabinet scraper or sandpaper. Use a circular saw with a straightedge cutting guide fence to trim the ends of the benchtop so it’s 60 in. long. Trim some stock from both ends, making sure the ends are square to the edges of the top. Mark a layout line for drilling guide holes for the bench dogs. We used a 3⁄4-in.-dia. brad-point bit to drill the guide holes for the 3⁄4-in.-dia. dogs we purchased. If the vise you’ll be installing on the end of your bench has a pop-up bench dog, draw the layout line so it’s aligned with the center of the vise dog after the vise is installed. Otherwise, center the line with the midpoint of the vise jaw. We drilled guide holes every 6 in. Use a portable drill guide to ensure that the holes are exactly vertical.
3. Build the Base.
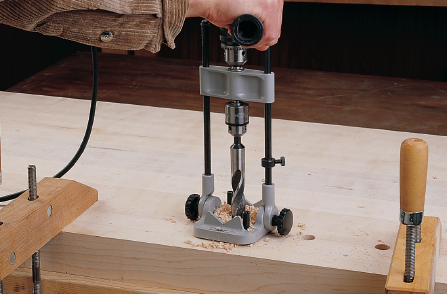
Rip four 11⁄2-in.-thick boards to 3 in. wide, then cross-cut them to 281⁄2 in. to make the legs. Rip the two 11⁄2-in.-thick leg cross braces to 31⁄2 in. wide, then cut them to a length of 8 in. Draw square lines across the inside edges of the legs for the placement of the cross braces. The lower lines should be 73⁄4 in. up from the bottoms of the legs, and the upper lines should be 31⁄2 in. above the lower lines. Lay out holes for two 1⁄2 x 2-in. fluted dowels per joint and drill holes with a dowel drilling guide. Glue the dowels and joints and clamp up two legs to a cross support, adding the clamps to protect the wood. Check the squareness by measuring to make sure the distance between the tops of the legs and the bottoms is the same. Make both side assemblies.
Cut the feet to 4 x 22 in. Lay out the angled cutting lines by marking out the measurements. Use a straightedge to draw lines connecting these marks. Cut out the shape of the feet with a band saw or jig saw. Sand the sawn edges smooth.
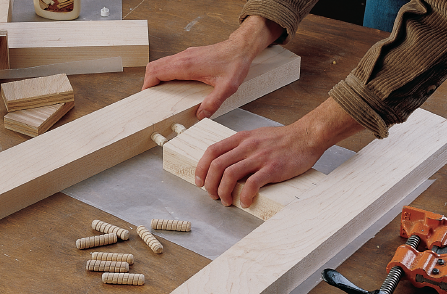
4. Use Pipe Clamps
Lay out and drill dowel holes connecting the ends of the legs to the tops of the feet. Glue and clamp the feet to the legs. Rip the two leg stretchers and the two leg top supports to 31⁄2 in. wide from 11⁄2 in. stock. Cross-cut the stretchers to 31 in. and the supports to 18 in.
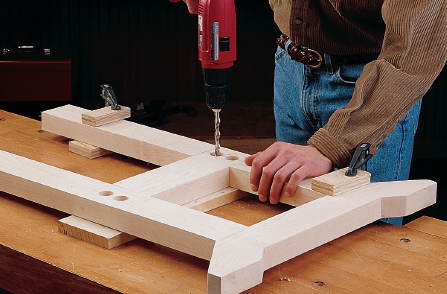
5. Drill the Counterbone Holes
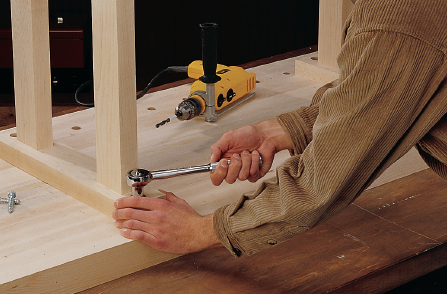
Continue the cross support layout lines already on the legs, squaring them across the faces of the legs to serve as placement lines for the leg stretchers. Mark lines for the thickness of the stretchers, centered on the legs. Mark centerpoints for two lag-screw pilot holes at each joint. Drill 3⁄4-in.-dia. x 3⁄8-in.-deep counterbores for each hole, then drill 1⁄4-in. pilots through the center of each counterbored hole. Position the stretchers between the side assemblies and assemble the base temporarily by clamping across the leg cross supports. Line the stretchers up with their marks and drill pilot holes through the lag holes into the ends of the stretchers. Drill counterbored holes in the top supports, then center the top supports on the legs and drill pilot holes into the tops of the legs. Also drill guide holes for the lag screws that attach the top supports to the underside of the benchtop.
6. Assemble the Base.
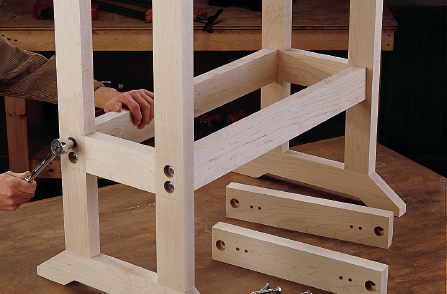
Attach the legs to the ends of the leg stretchers with 3⁄8 x 3-in. lag screws fitted with 3⁄8-in. washers. Bolt the leg top supports to the tops of the legs with the same size lag screws.
7. Install the Shelf.
Plane 4⁄4 maple down to 3⁄4 in. thick to make the shelf slats. Rip-cut and cross-cut the inner and outer slats to size. Lay the outside shelf slats onto the stretchers, with their edges flush with the sides of the legs. Drill a countersunk pilot hole for a #10 x 11⁄2-in. flathead wood screw near each end of each outer slat, centered over the stretcher below. 18 Place the inside shelf slats on the leg cross braces with their ends flush with the braces. Use 1⁄2-in. spacer blocks between slats to ensure even gaps. Drill a pair of countersunk pilot holes at the end of each inner slat, centered over the cross brace below. Drive two #10 x 11⁄2-in. flathead wood screws at each end.
8. Attach the Benchtop
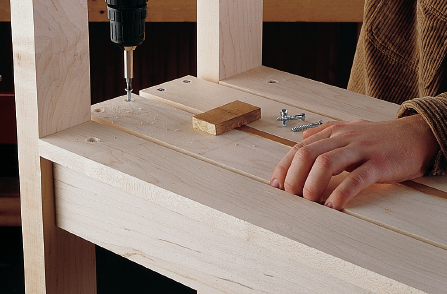
Attach the benchtop. Sand all parts to 150-grit and ease all sharp edges. Lay the benchtop upside-down and center the base on the underside of the top. Drill counterbored pilot holes into the top and attach the leg top supports to the underside of the top with washers and 3⁄8 x 3-in. lag screws.
9. Apply the Finishing Touches.
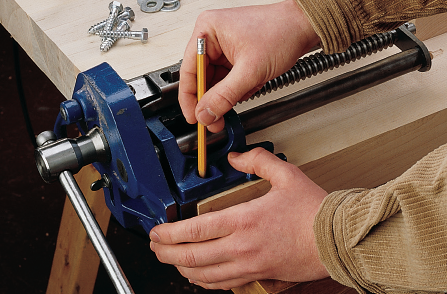
Read the manufacturer’s instructions for installing your bench vises. Cut hardwood jaw plates and screw them to the metal jaws through the jaw holes on the vise. Make up the appropriate filler blocks to shim each vise so the top edges of the jaws are flush with the benchtop. The vises we selected or our bench are installed with 3⁄8 x 2-in. lag screws driven up through the underside of the vise and into the benchtop. Apply a protective finish to the workbench. We used a single coat of Danish oil. Do not apply more than one coat of finishing material, since multiple layers make the surface more slippery. Every other year or so, depending on wear, remove the oil finish with mineral spirits, sand the surface, and apply a fresh finish.
10. Start Woodworking!
Now that you have your woodshop workbench, you can start building! For workbench plans for this project, tips and techniques used, or more classic projects for your home or workspace, check out The Complete Book to Woodworking.
More Woodworking Books

Practical Weekend Projects for Woodworkers
Finish a project in a weekend with this project book featuring 33 plans for shelving, a bed, coffee tables, a gothic-style bathroom cabinet, a Shaker-style kitchen cabinet, an Adirondack chair, and more! With straightforward tutorials, this book will provide practical advice and inspiration for both beginner and experienced woodworkers.
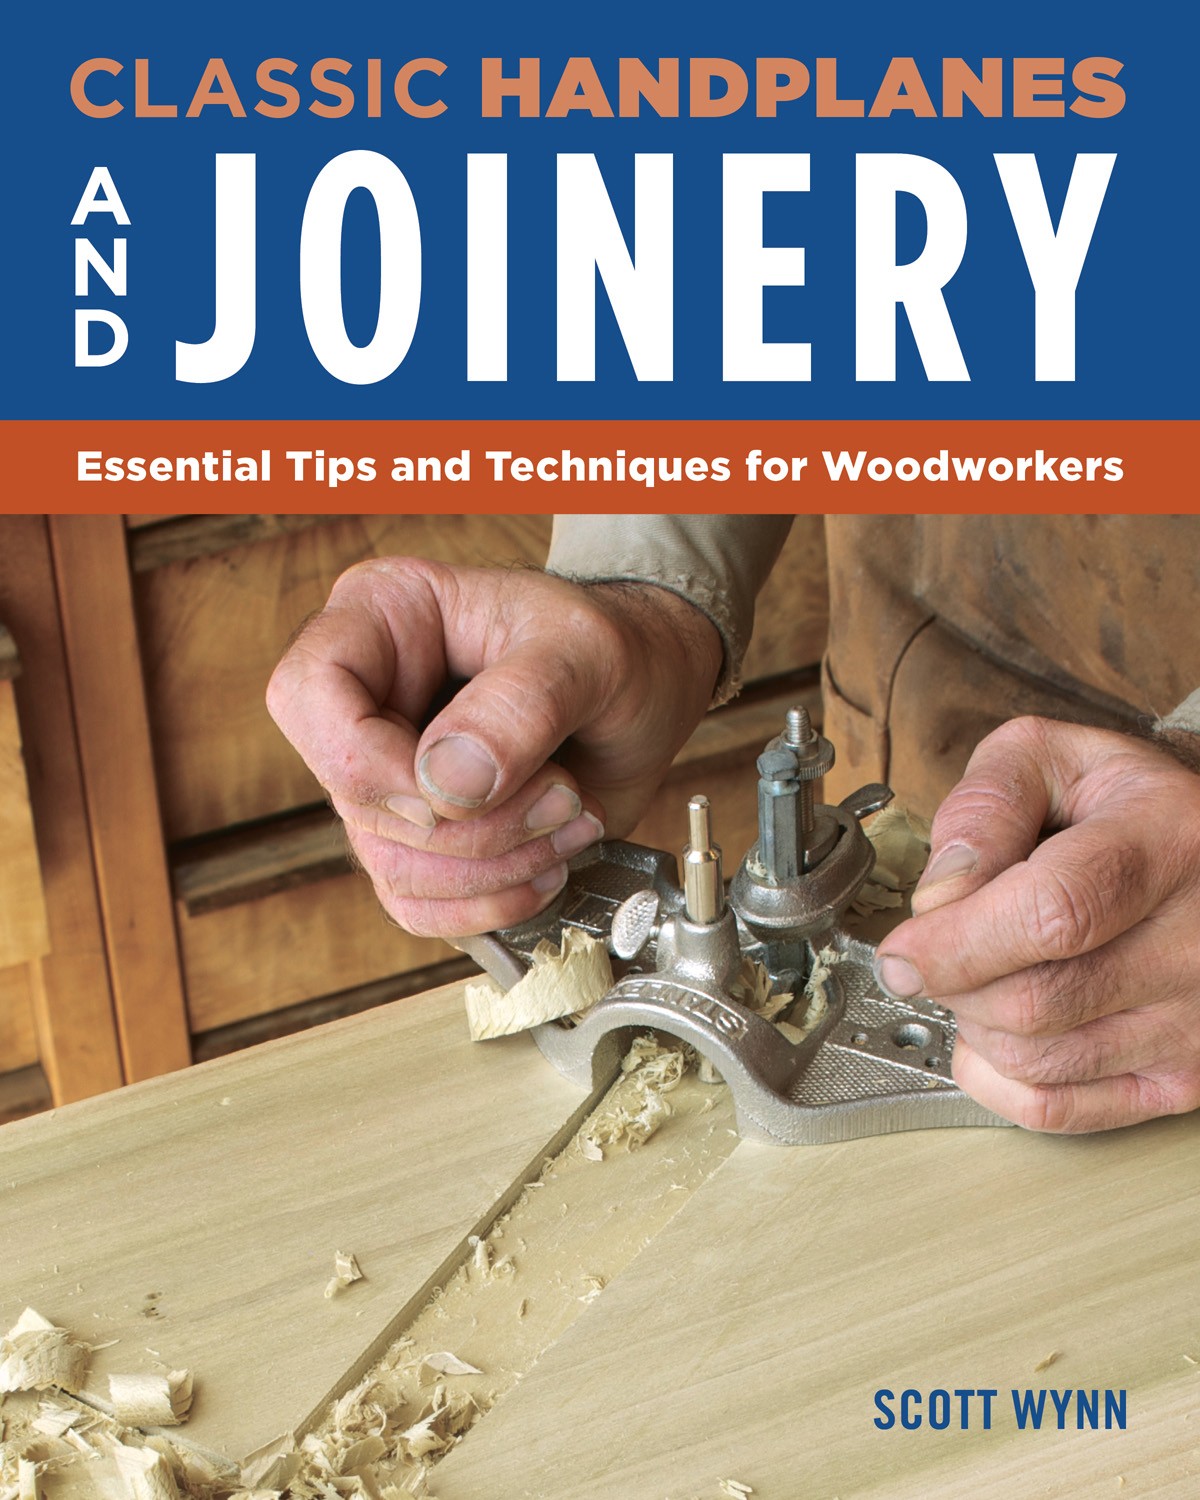
Classic Handplanes and Joinery
This ultimate manual on hand-cut joinery provides for building furniture by hand. Learn how to cut perfect dado, groove, rabbet, and mortise & tenon joints. Master popular joinery planes like shoulder planes, router planes, rabbet planes, plow planes, and more.
Get Exclusive Email Offers And Receive 15% OFF On Your First Book Order!


Recent Comments