

Many companies spend lots of resources and effort to create a blog that supports their business, particularly the sales process. Yet many corporate bloggers complain that while blogs contain relevant information and attract visitors, they can’t track how their blog has influenced sales. Social media has raised customers’ expectations about the information they need before they purchase. If your blog content is relevant to prospects’ and customers’ needs before and after purchase and your products deliver on their promise, you can convert your blog into a sales machine.
3 cs of using your blog to sell
Content. Provide useful, educational and entertaining content. Present information based on your product offering and customers’ problems or needs.
Context. While your end goal is to sell, consider the context of your blog posts. Here, you’re a tour guide through your firm’s extended offering – not an auctioneer. Your job is to show readers how to use your firm’s products.
Commerce. Once you’ve given your readers useful information in a meaningful setting, they may be interested in actually plunking down their credit card. Unfortunately, here’s where many business blogs stop. Blog editors, familiar with their company’s e-commerce site and how to find specific products, can assume readers innately know how to find the product or have the motivation to track it down. Don’t get me wrong. Some very small percentage of prospects will to go extreme efforts to find the product. Unfortunately, the rest will just leave or worse go to your competitor.
Ways to convert your traffic to sales
To make your blog an effective sales machine, integrate your product into your content in a way that doesn’t scream BUY, BUY, BUY. Here are five steps to provide relevant information and eye-candy to lure readers in and help convert blog posts to sales receipts.
Provide useful, relevant information. Show prospects how to use your product, give them instructions or how-tos, and/or entertain them.

Showing making procedure is a good way to guarantee product quality
Include a variety of different forms of content. Photographs and videos are particularly important because readers tend to be visual and want to see your product in action.


Get customer attention by clean visual and video
Make it easy to buy by eliminating stumbling blocks to purchase. Don’t assume customers know which item you’re talking about in your post. Provide a link directly to the product page or just link the product to your blog so they can buy if they want. If it relevant give readers more than one way to get to the product.
Article credit: Heidi Cohen (https://heidicohen.com/use-blog-to-sell/)


Diving into scroll-saw work can feel like stepping into a world of endless shapes, patterns, and artistic freedom—if you have the right saw under your fingertips. Choosing your first scroll saw is more than picking the flashiest model on the shelf: it’s about matching your budget, workspace, skill level, and project ambitions. In this guide, we’ll walk through today’s top considerations so you can buy—and start cutting—with confidence.
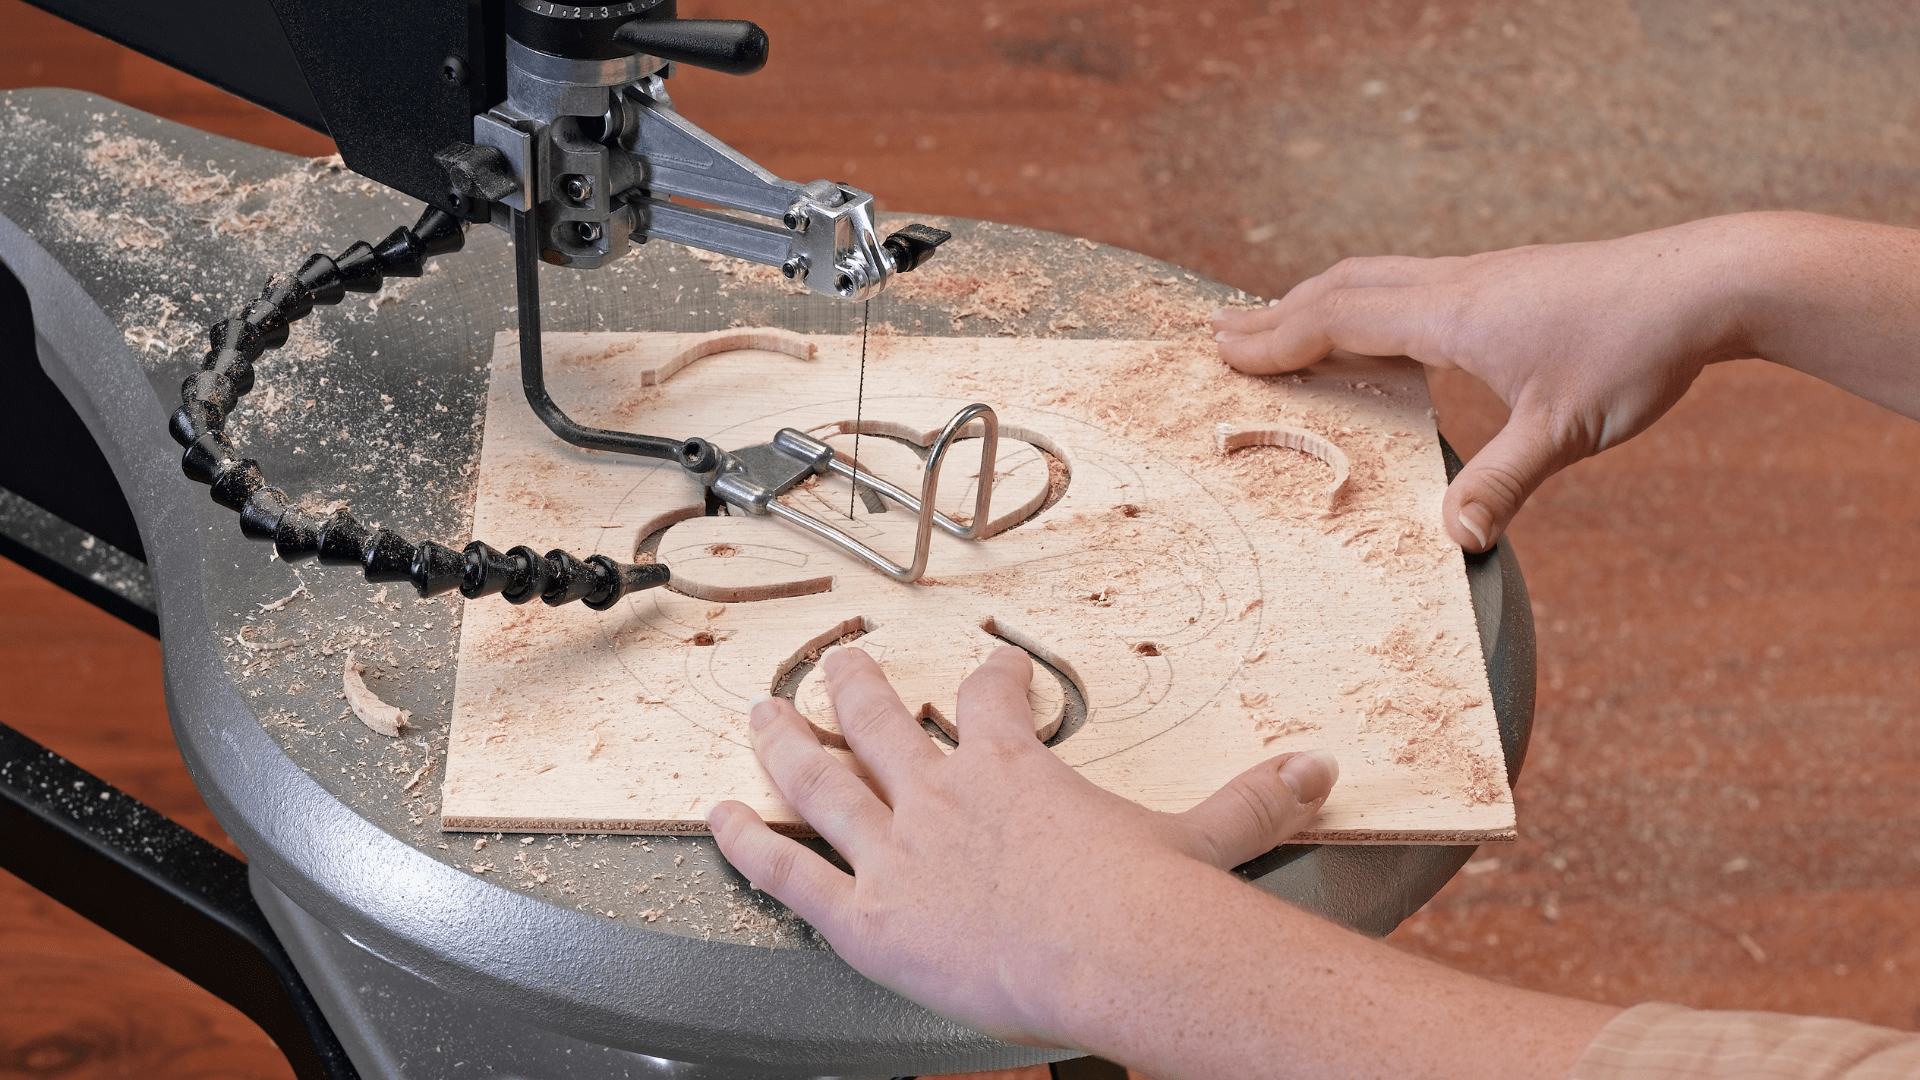
1.Understanding Scroll Saw Styles
Before you shop, get familiar with the two main machine styles on the market:
-
Parallel-Link (Parallel Arm)
-
How it Works: Two parallel arms move up and down in sync.
-
Pros: Less vibration, consistent blade angle.
-
Cons: Slightly more expensive; heavier footprint.
-
C-Arm (Arch Arm)
-
How it Works: A single, arch-shaped arm holds both blade ends.
-
Pros: Cost-effective, lightweight, compact.
-
Cons: Can vibrate more; blade angle may flex under heavy cuts.
Brand-Tip: If you plan intricate fretwork with fine blades, parallel-link models deliver smoother action. For casual hobby use in a small shop, a quality C-arm saw can be all you need.
2. Key Features to Prioritize
When scanning product specs or demoing in-store, look for these features:
|
Feature |
Why It Matters |
|
Variable Speed Control |
Adjust RPMs (500–1,700 SPM) for plywood, hardwood, veneers |
|
Blade Tensioning System |
Quick-release levers make blade changes a breeze |
|
Throat Depth (Cutting Width) |
Determines maximum pattern size you can cut—12″, 16″, 20″+ |
|
Dust Collection Port |
Keeps your workspace clear and your lungs happy |
|
Table Tilt Capability |
0–45° bevel cuts unlock angled fretwork |
|
Stroke Length |
Longer strokes (5/8″–1″) cut faster through thick stock |
|
Built-In LED Lighting |
Shadows vanish, and fine details pop |
Pro Tip: Don’t skimp on speed control. High speeds burn delicate veneer, while low speeds snag thick hardwood.
3. Aligning Your Budget & Goals
|
Budget Tier |
What You Get |
Great For |
|
Under $200 |
Basic C-arm saw, limited speed settings, small throat (12″–16″) |
Weekend projects, toy-making, simple templates |
|
$200–$400 |
Mid-range C-arm or entry parallel arm, variable speed, tilt table |
Hobbyists serious about detail |
|
$400+ |
Premium parallel-link, heavy-duty motor, advanced tension systems |
Professional work, thick stock, high output |
-
Starter Saw: If you’re curious but uncommitted, a sub-$200 C-arm is low-risk.
-
Hobbyist Upgrade: Around $300, look for 16″ throat depth and a sealed motor.
-
Pro Workhorse: Above $500, expect a parallel arm, superior dust porting, and extra stability.
4. Workspace & Ergonomics
Your dream saw is only as good as your shop setup:
-
Bench Footprint
-
Measure tabletop space—many saws need 18″×24″ or more.
-
Vibration Damping
-
Place anti-vibration mats or a dedicated stand to reduce shake.
-
Lighting
-
Supplement built-in LEDs with an adjustable gooseneck lamp for intricate cuts.
-
Dust Management
-
Hook up a shop vac to the dust port or add an overhead extractor arm.
Workflow Hack: Keep a magnetic screwdriver rack and blade organizer within arm’s reach—blade swaps and minor tweaks shouldn’t slow you down.
5. Blade Basics & Selection
Blades can make or break your experience. Here’s a quick start:
|
Blade Type |
Teeth per Inch (TPI) |
Ideal Use |
|
Standard Skip |
10–14 TPI |
General cutting, medium curves |
|
Reverse Skip |
6–10 TPI |
Prevents bottom-surface tear-out |
|
Double-Tooth |
4–6 TPI |
Fast cutting of hardwood |
|
Ultra-Fine |
18–32 TPI |
Tiny details, jig puzzles |
|
Spiral |
N/A (spiral) |
Cuts in any direction, cleanup |
-
Tip: Start with a general-purpose 14 TPI skip blade. Upgrade to fine or reverse-skip as your projects demand.
6. Warranty, Support & Community
Buying from a brand with solid support channels will save headaches:
-
Warranty Length: Look for at least 2 years on the motor and frame.
-
Replacement Parts: Check availability of blades, belts, and bearings.
-
User Forums & Clubs: Brands like Excalibur, Delta, and DeWalt boast active user communities, pattern exchanges, and troubleshooting guides.
Confidence Boost: A quick scan of brand forums reveals common pitfalls and expert fixes—no need to go it alone.
Next Steps
Choosing your first scroll saw doesn’t have to be overwhelming. By focusing on saw style, key features, budget, shop setup, and blade basics—and by leaning on supportive brand communities—you’ll make a purchase that delivers reliable, precision cuts for years of creative projects.
Happy cutting!

